Building Drums
The tradition I learned from drum builders in Zululand is not complicated, but it is exacting. Every decision — which wood, which hide, how tight, how long — has consequences that show up later in the sound. A drum is not a box with a skin on it. It is a resonant body, and everything that goes into making it determines what it will carry and what it will say.
What follows is that process, step by step, as I practise it here in Costa Rica.
The Body
Guapinol — the singing wood of Costa Rica
The wood is Guapinol. It grows throughout Costa Rica and has been used here for generations in furniture, flooring, and construction — but what drew me to it for drums is the way it rings. Strike a piece of Guapinol and it gives back something: a warmth and sustain that most tropical hardwoods do not have. It is dense enough to hold its shape in humidity, yet it does not dampen the skin the way some heavier woods do. I have worked with other materials. I keep coming back to this one.
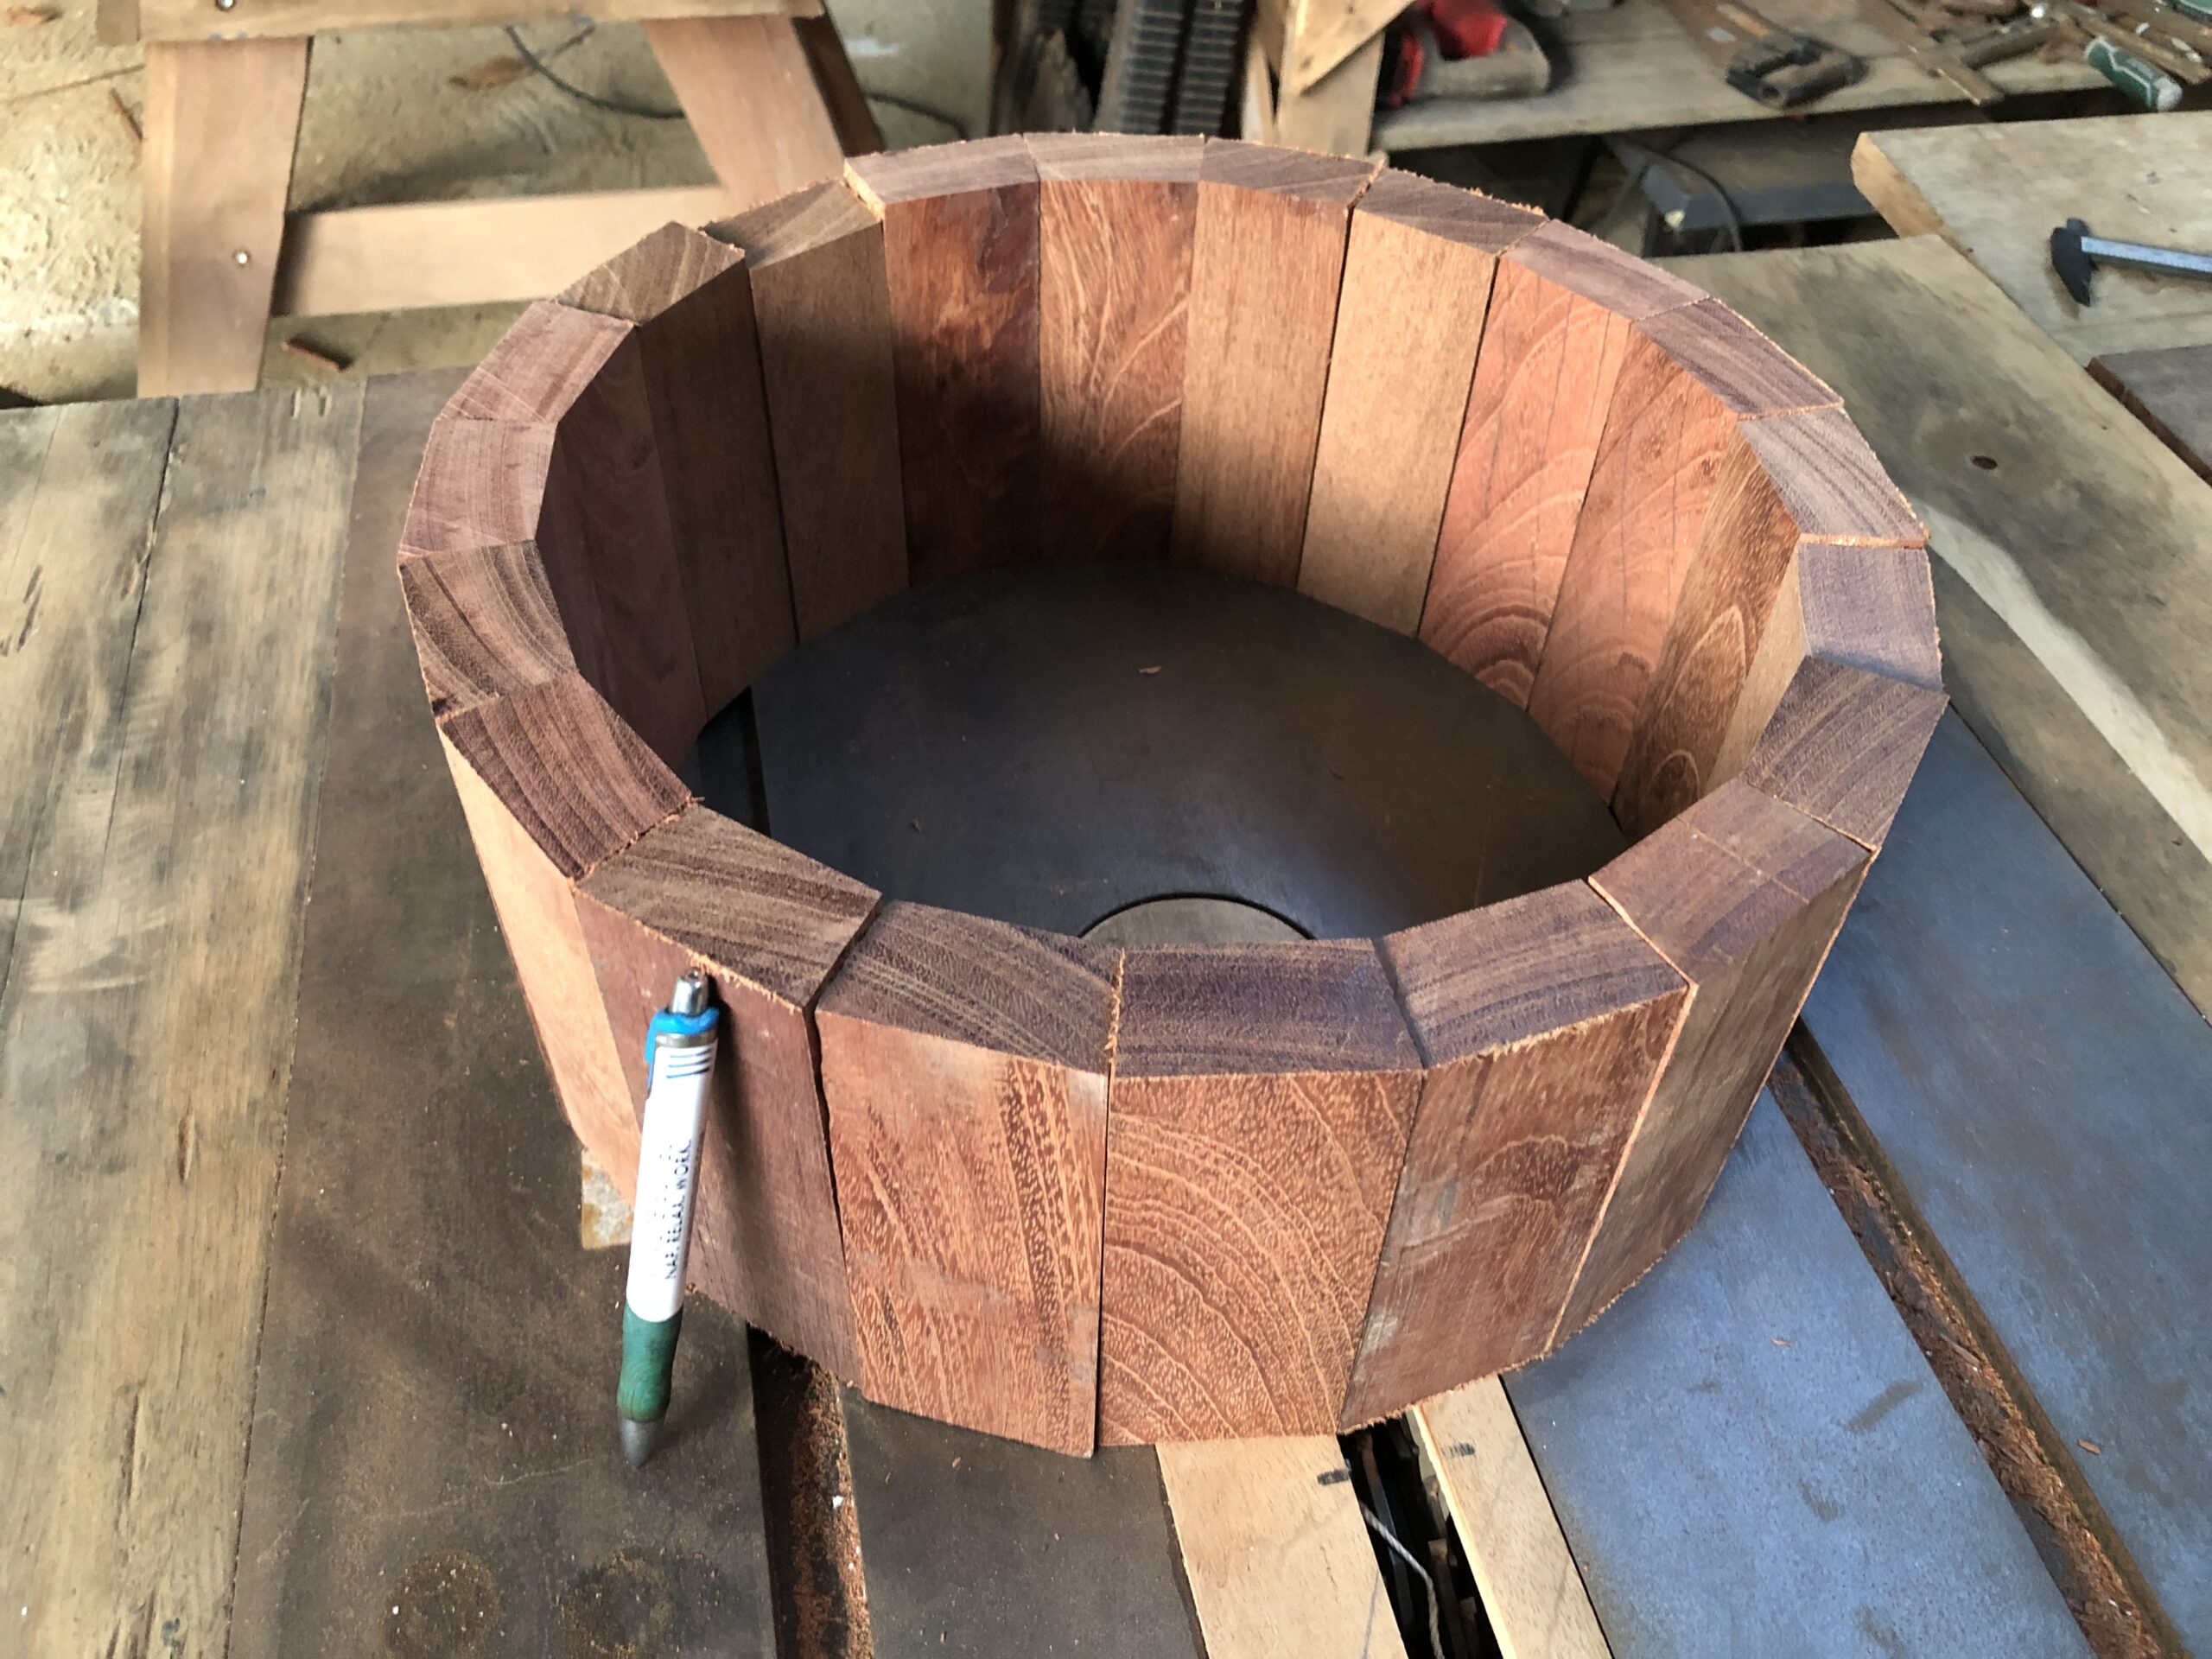
The drum body begins as individual staves — sections of Guapinol cut to length and angled on their edges so that when they are arranged side by side in a circle they meet cleanly, without gaps. Each stave is cut to the same width so the ring, when assembled, is even in thickness all the way around. This matters for how sound travels through the frame. An uneven body produces an uneven resonance, and the drum will have a bias — one side louder, one softer. I cut carefully.
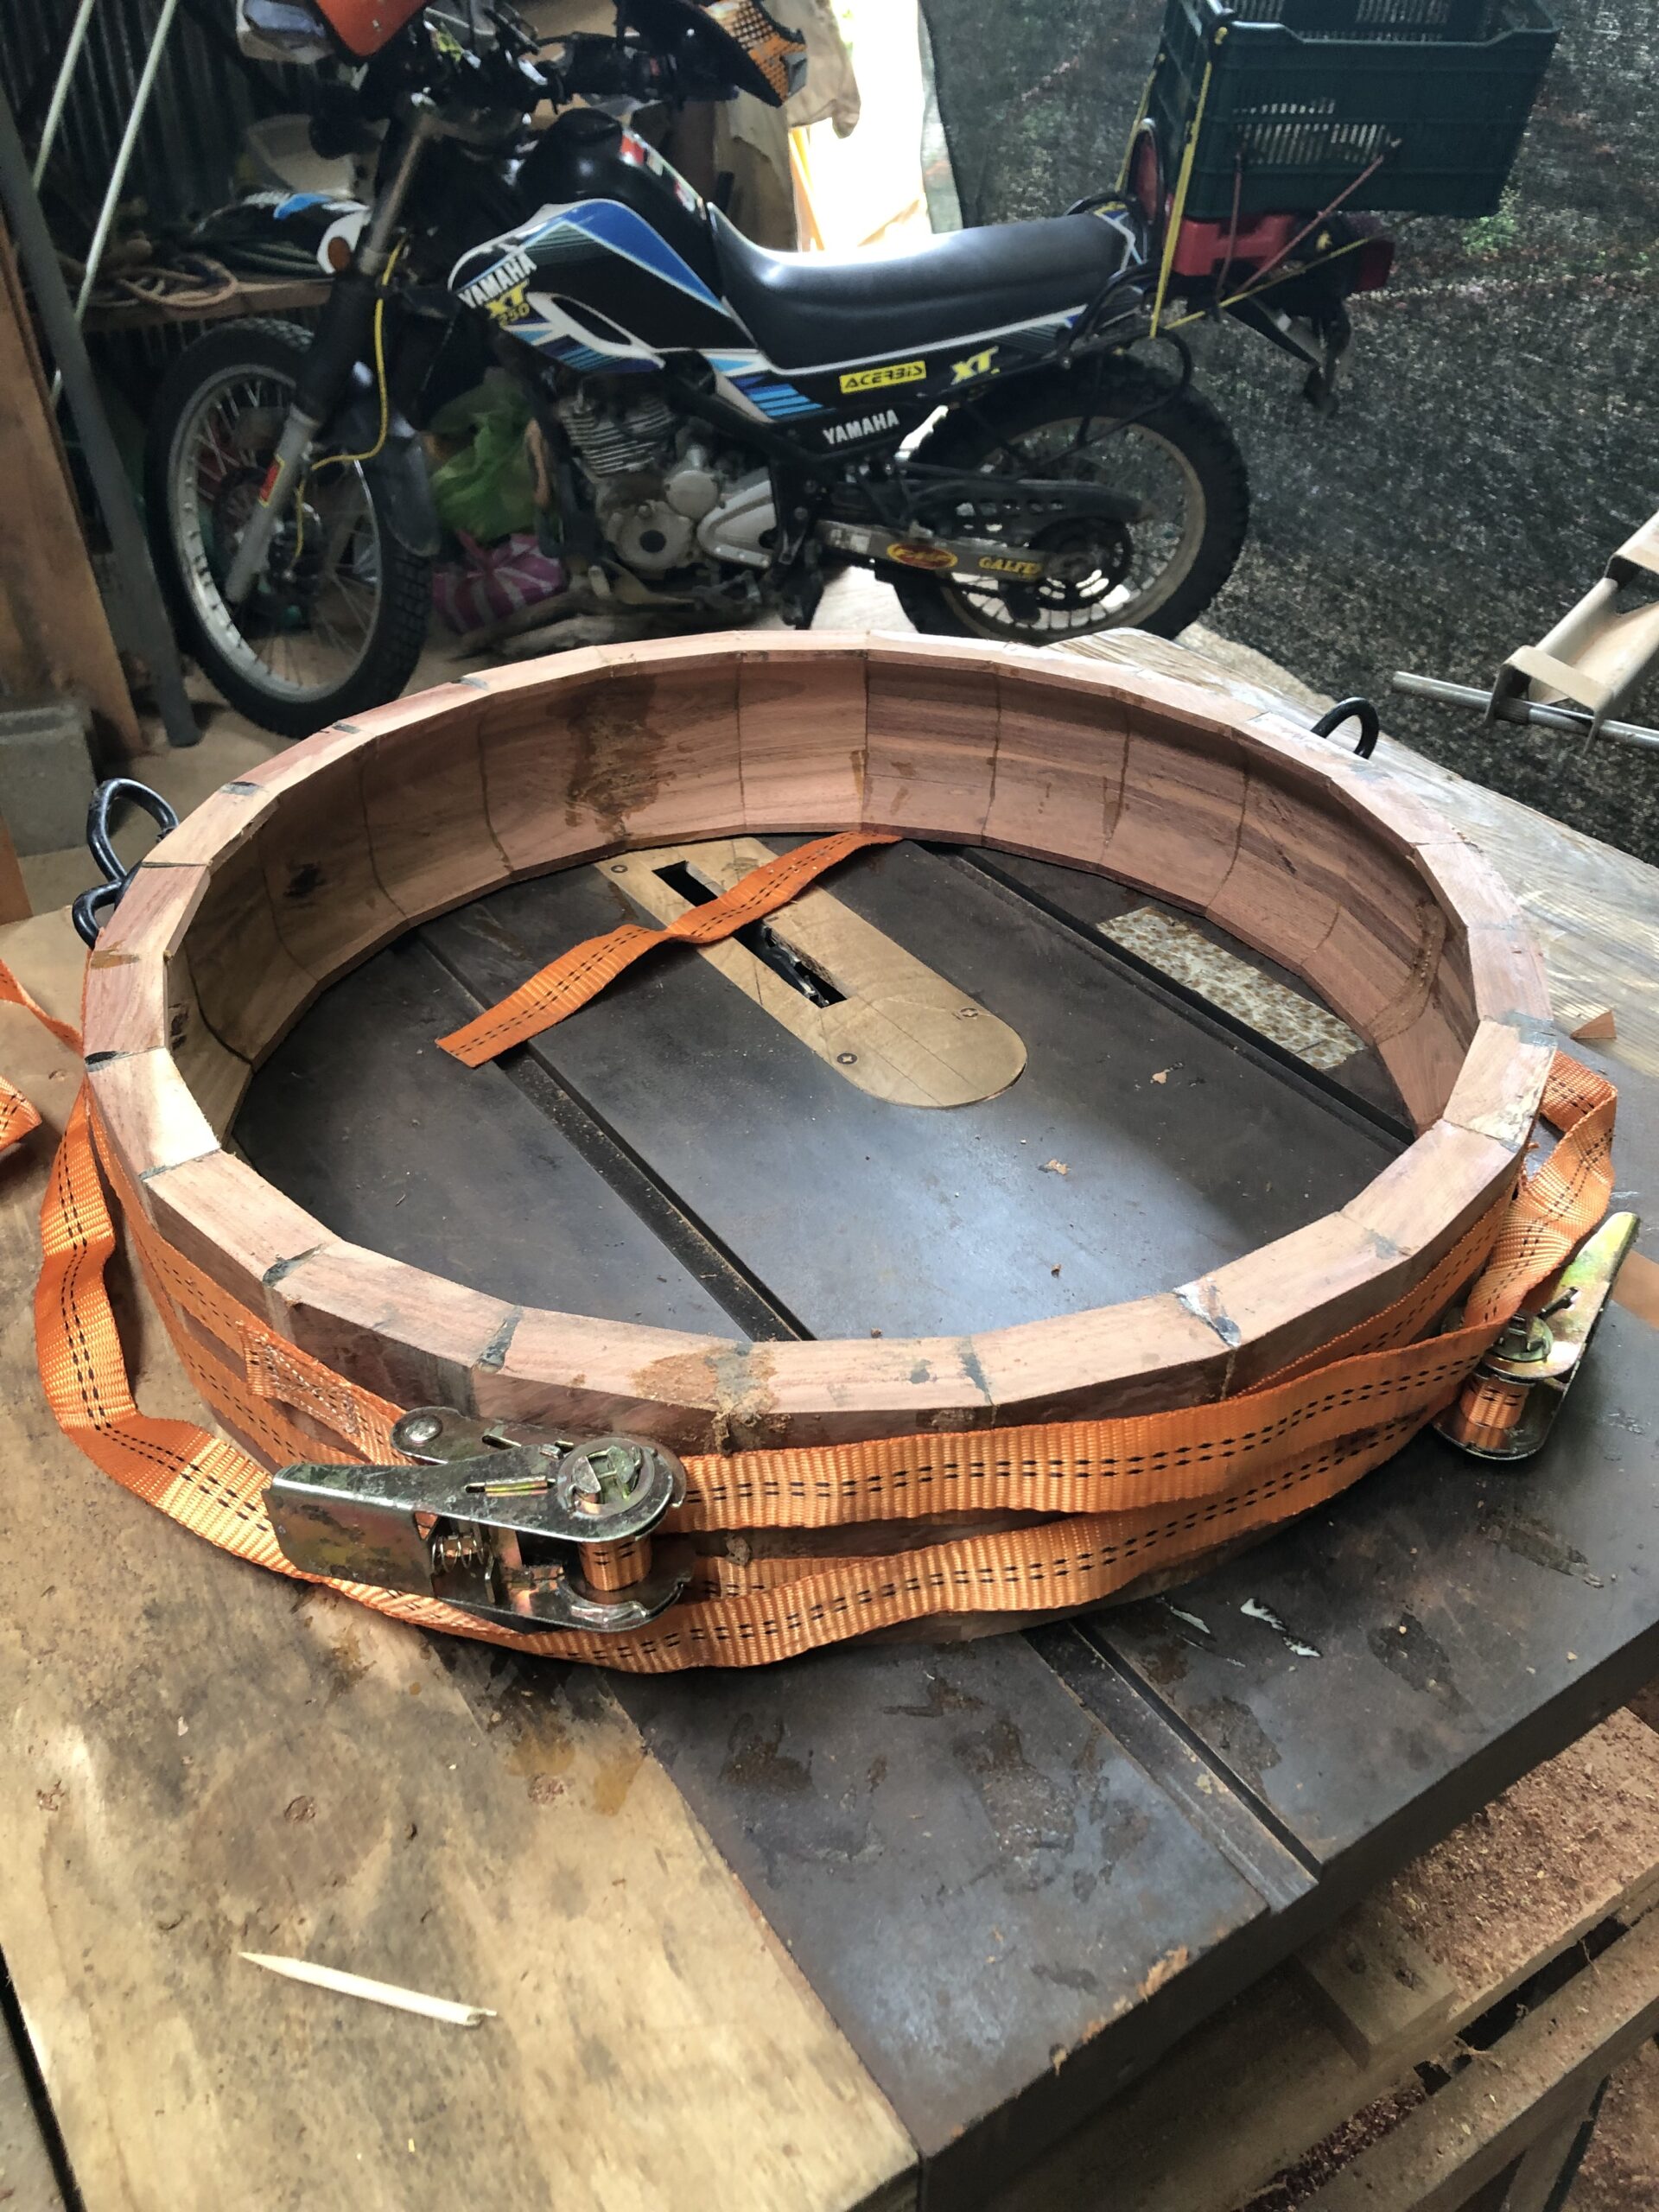
Once the staves are arranged, the body is pulled together and clamped while the glue sets. I use ratchet straps for this — long ones, wrapped around the outside of the ring and tightened until every joint closes. It looks industrial, and it is. Drum building is not a delicate process at this stage. The wood needs pressure, and it needs time. I leave it clamped overnight, sometimes longer if the air is wet.
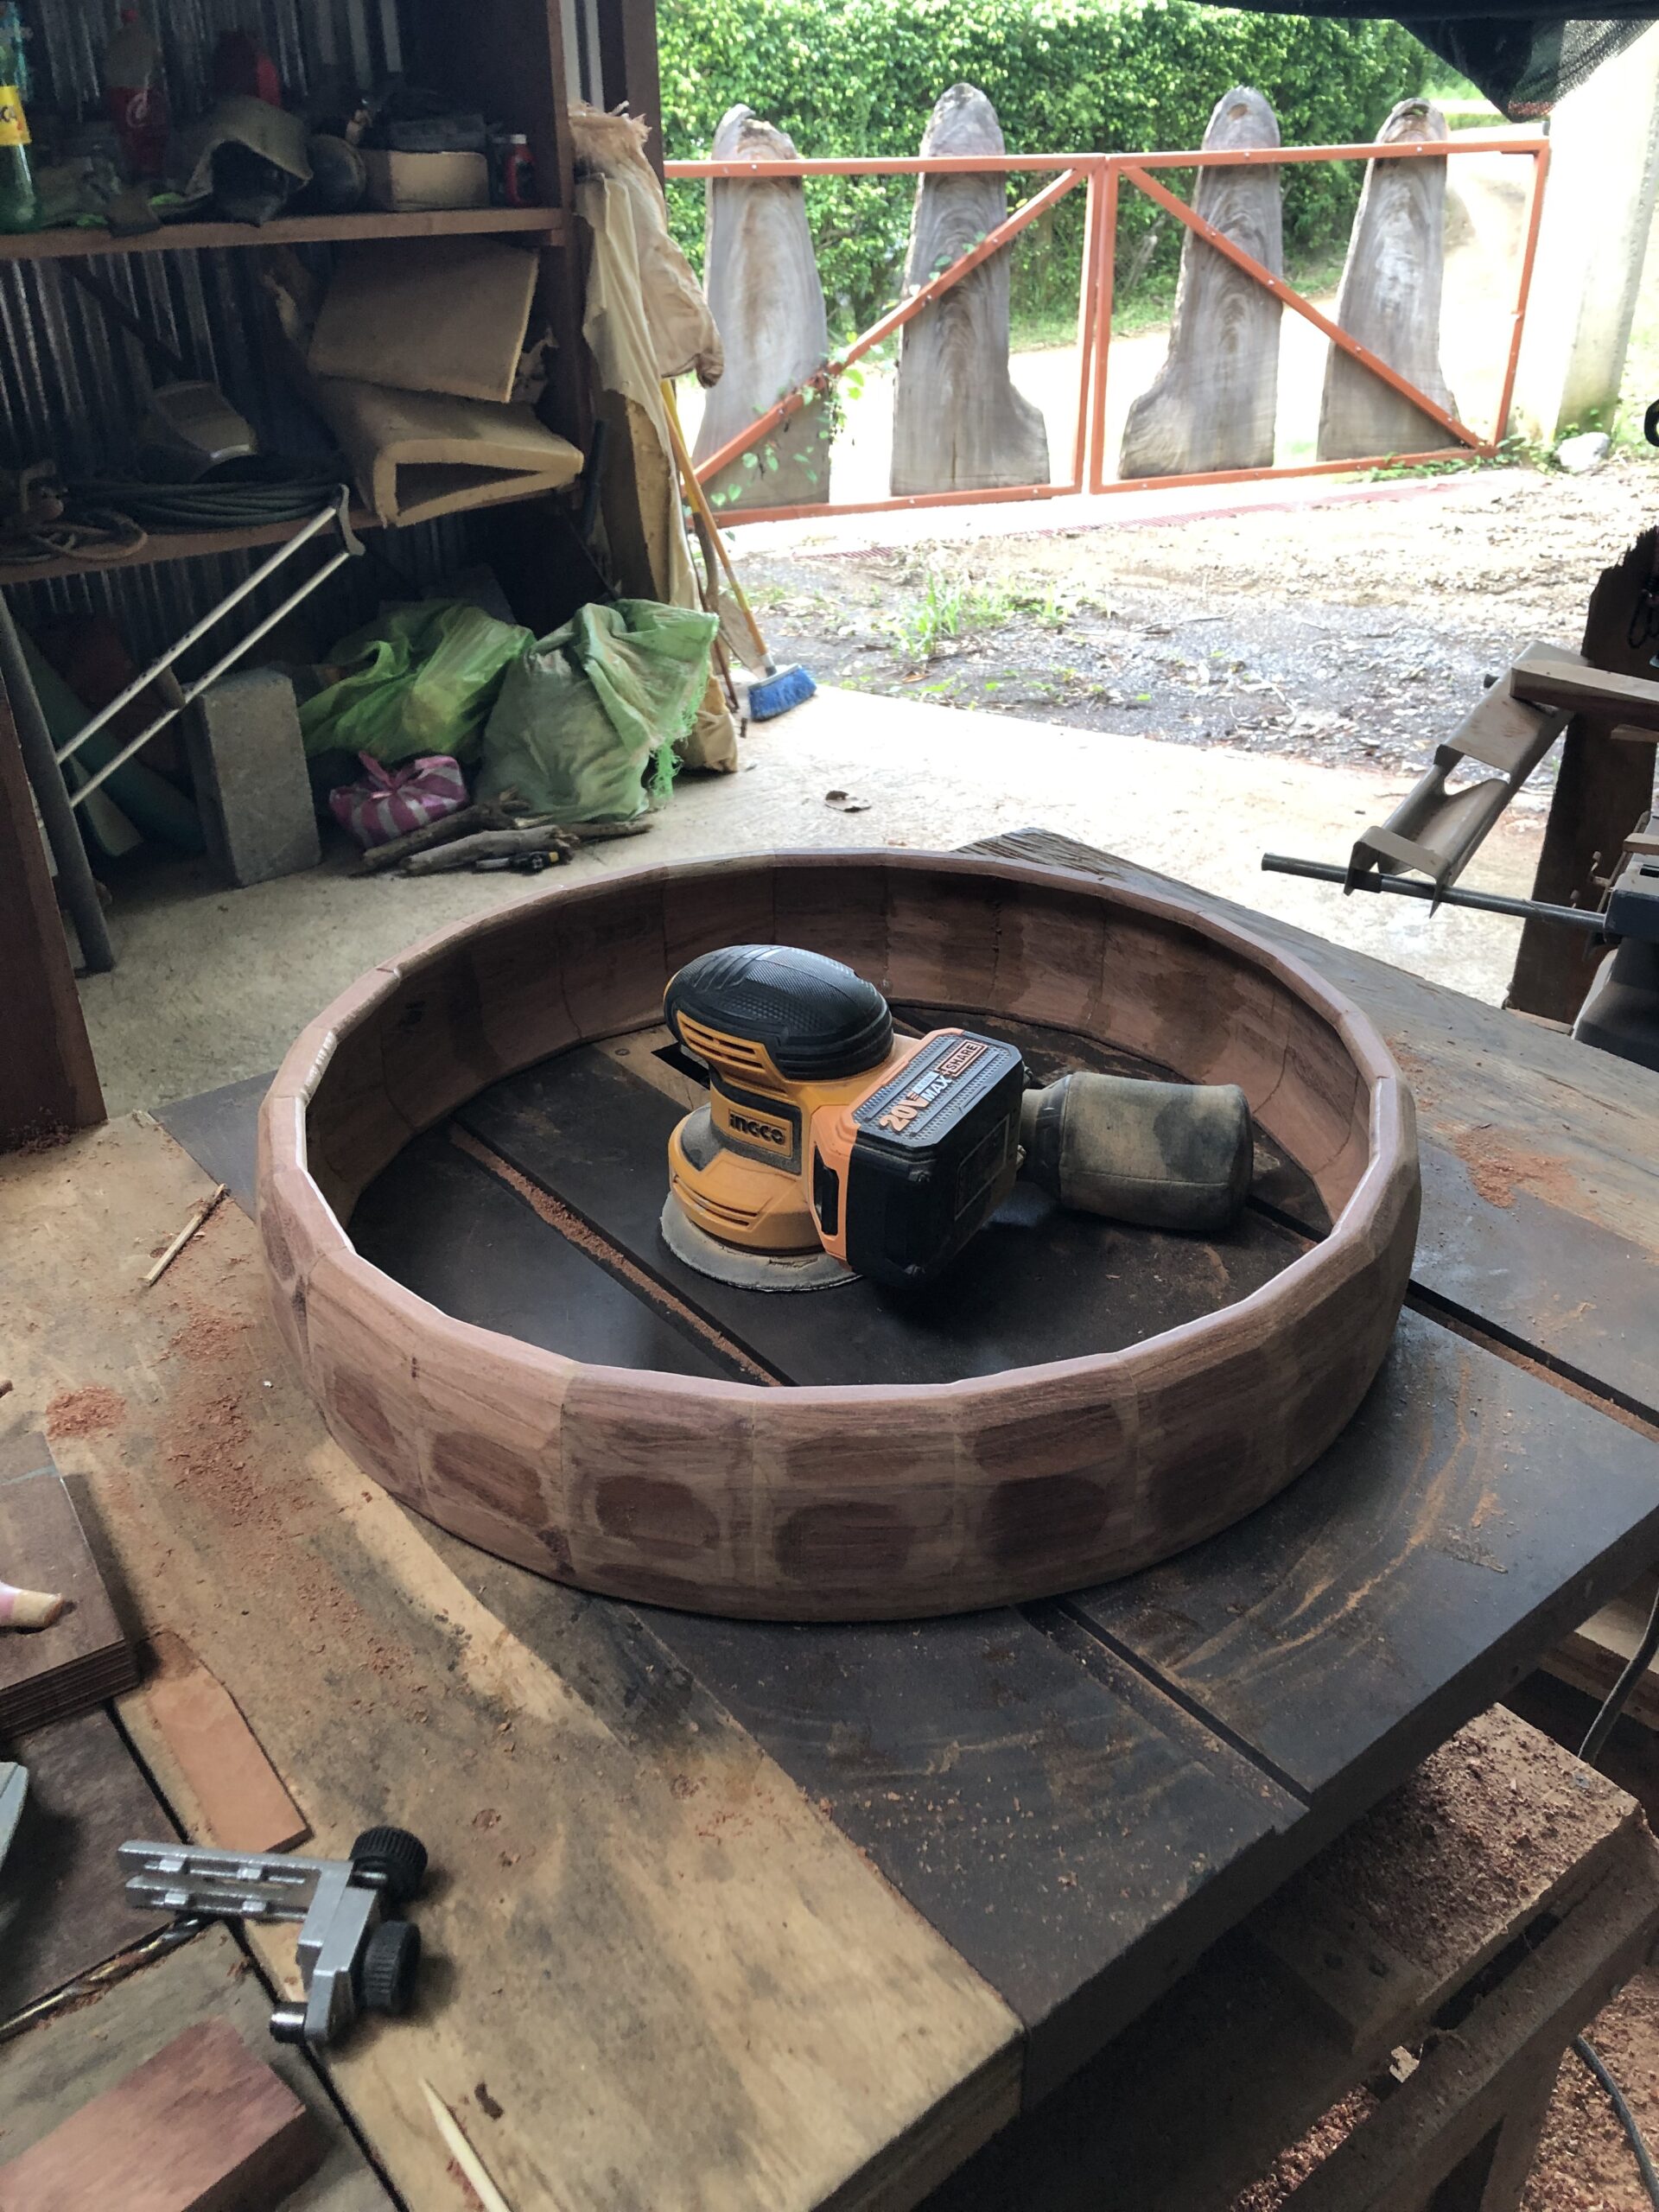
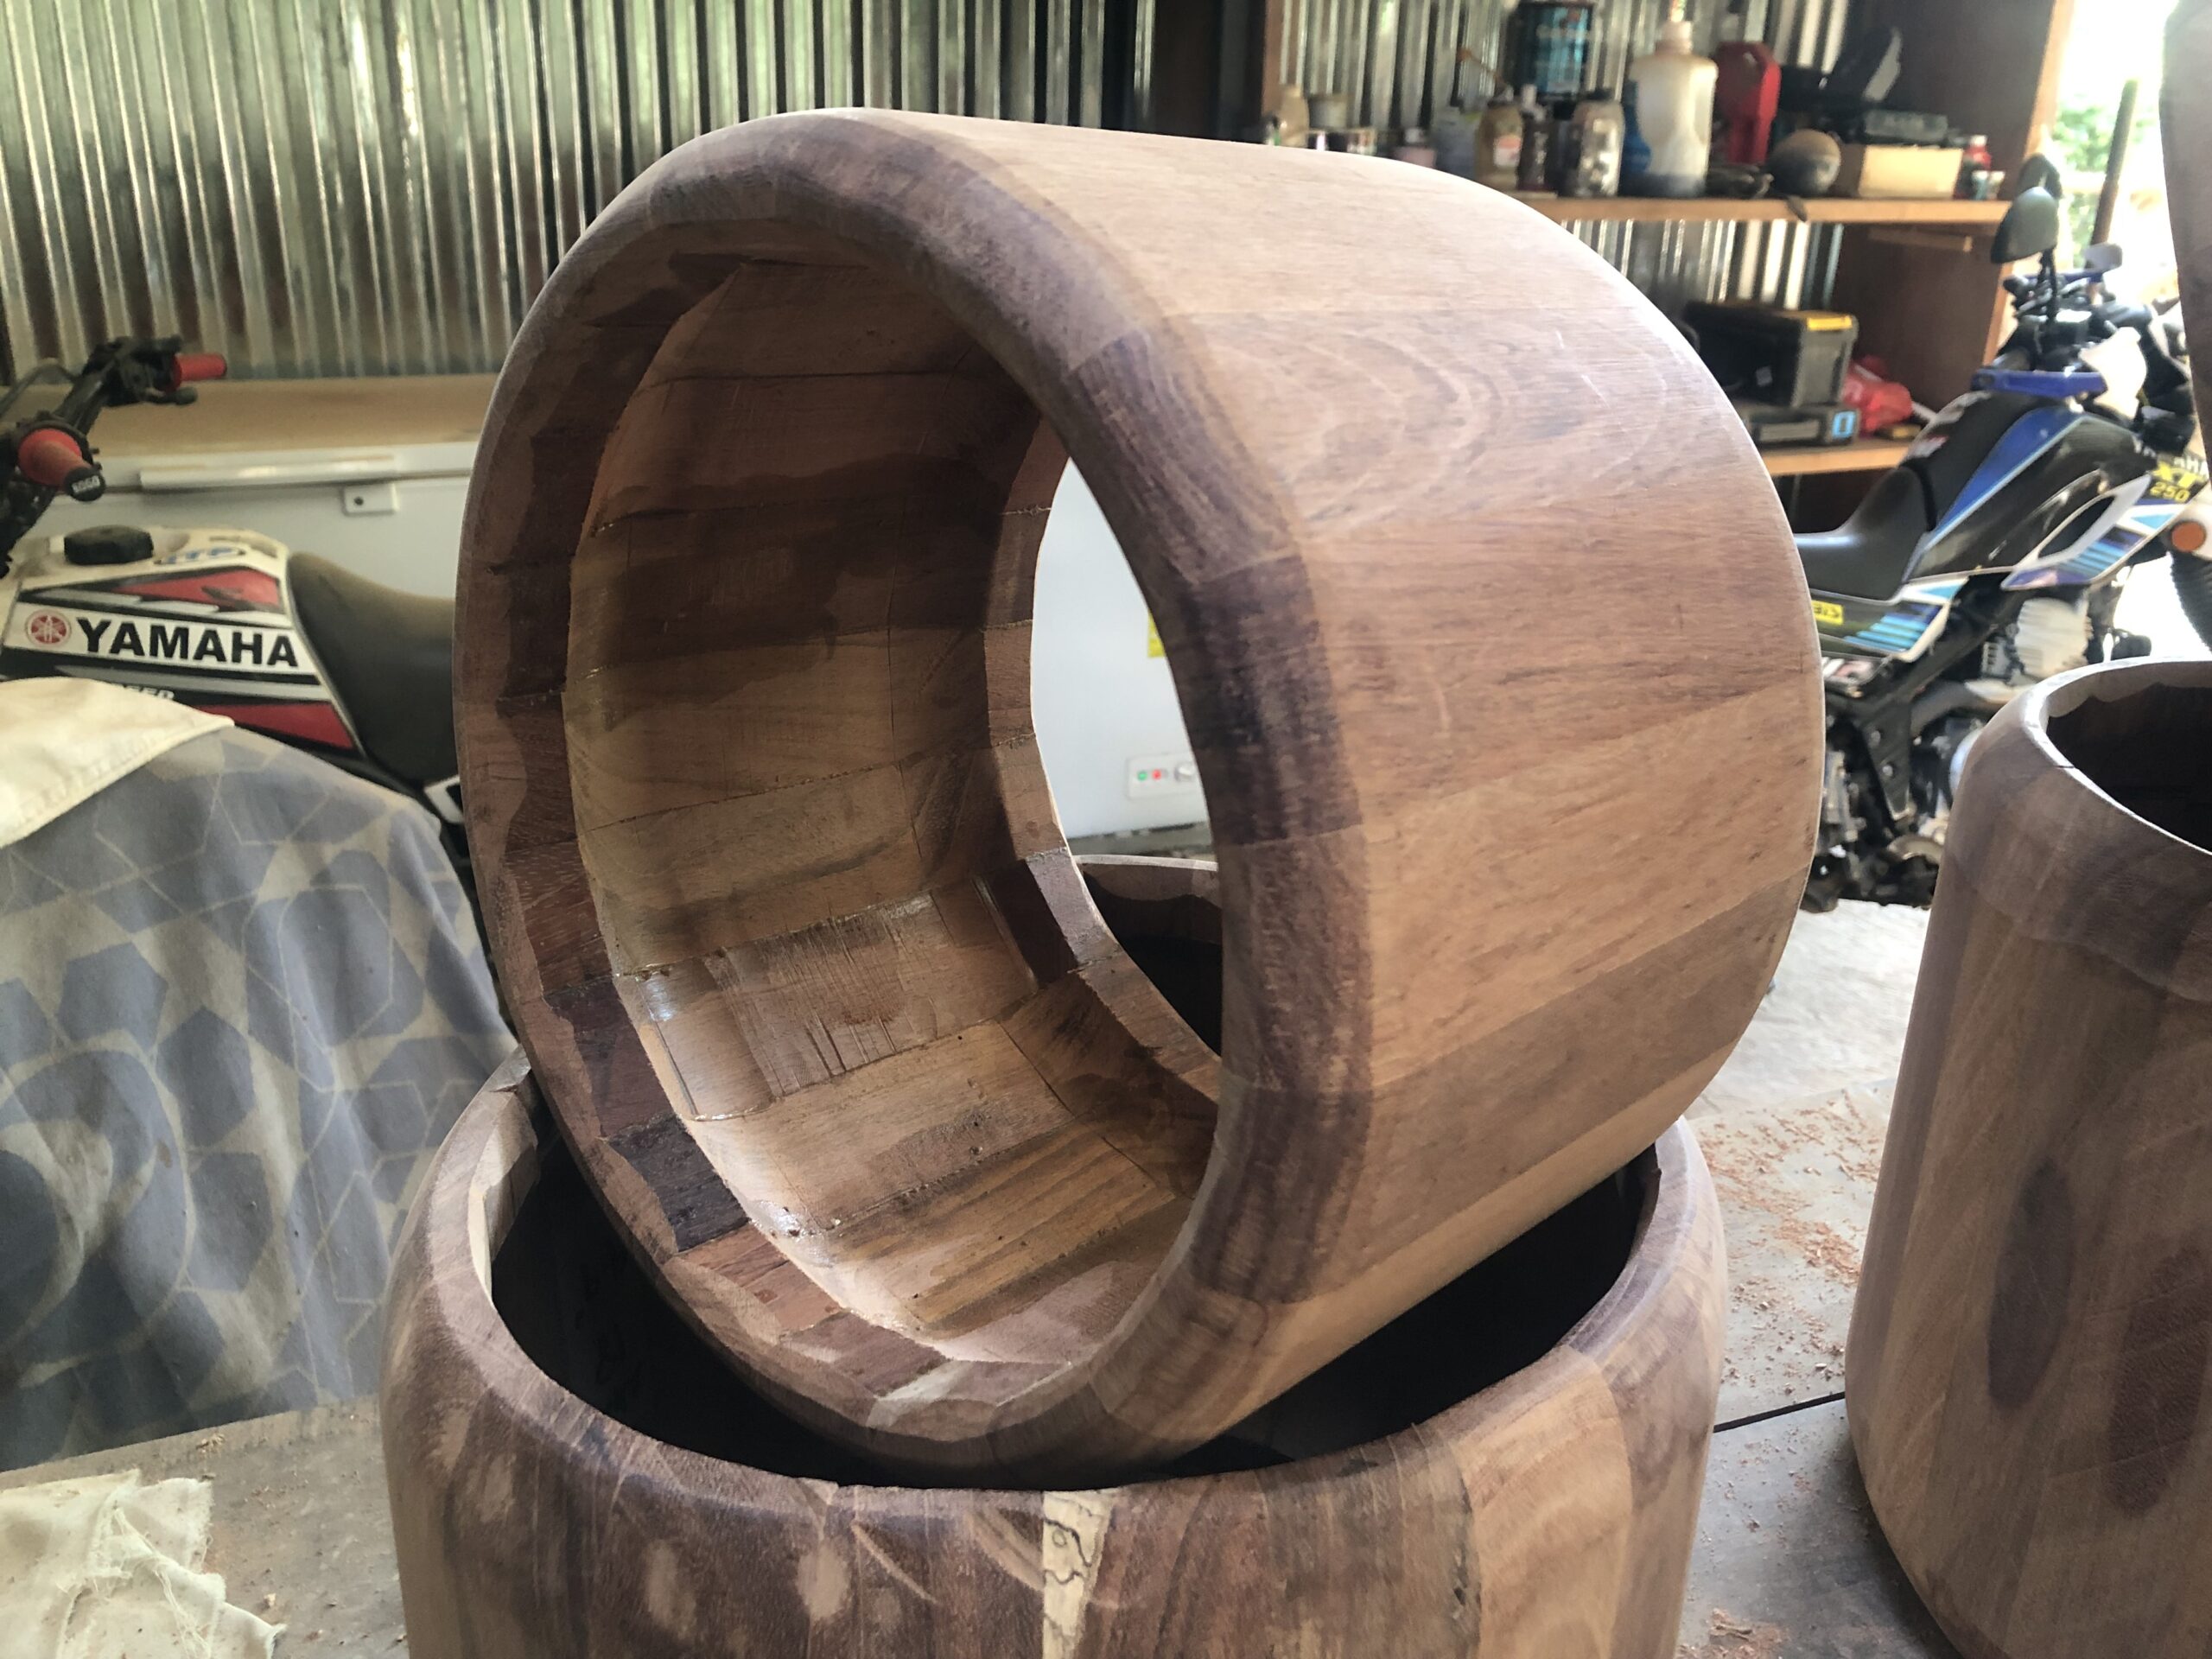
When the clamps come off, the body is rough — joints visible, edges uneven, the surface marked by the process of assembly. This is where the sanding begins. I work through progressively finer grits, shaping the outside curve until it is smooth and consistent, then the interior, then the top and bottom edges where the skin will eventually sit. These edges matter more than anything. If they are not flat and even, the skin will never seat properly and the drum will always sound wrong at the edge. I take my time here.
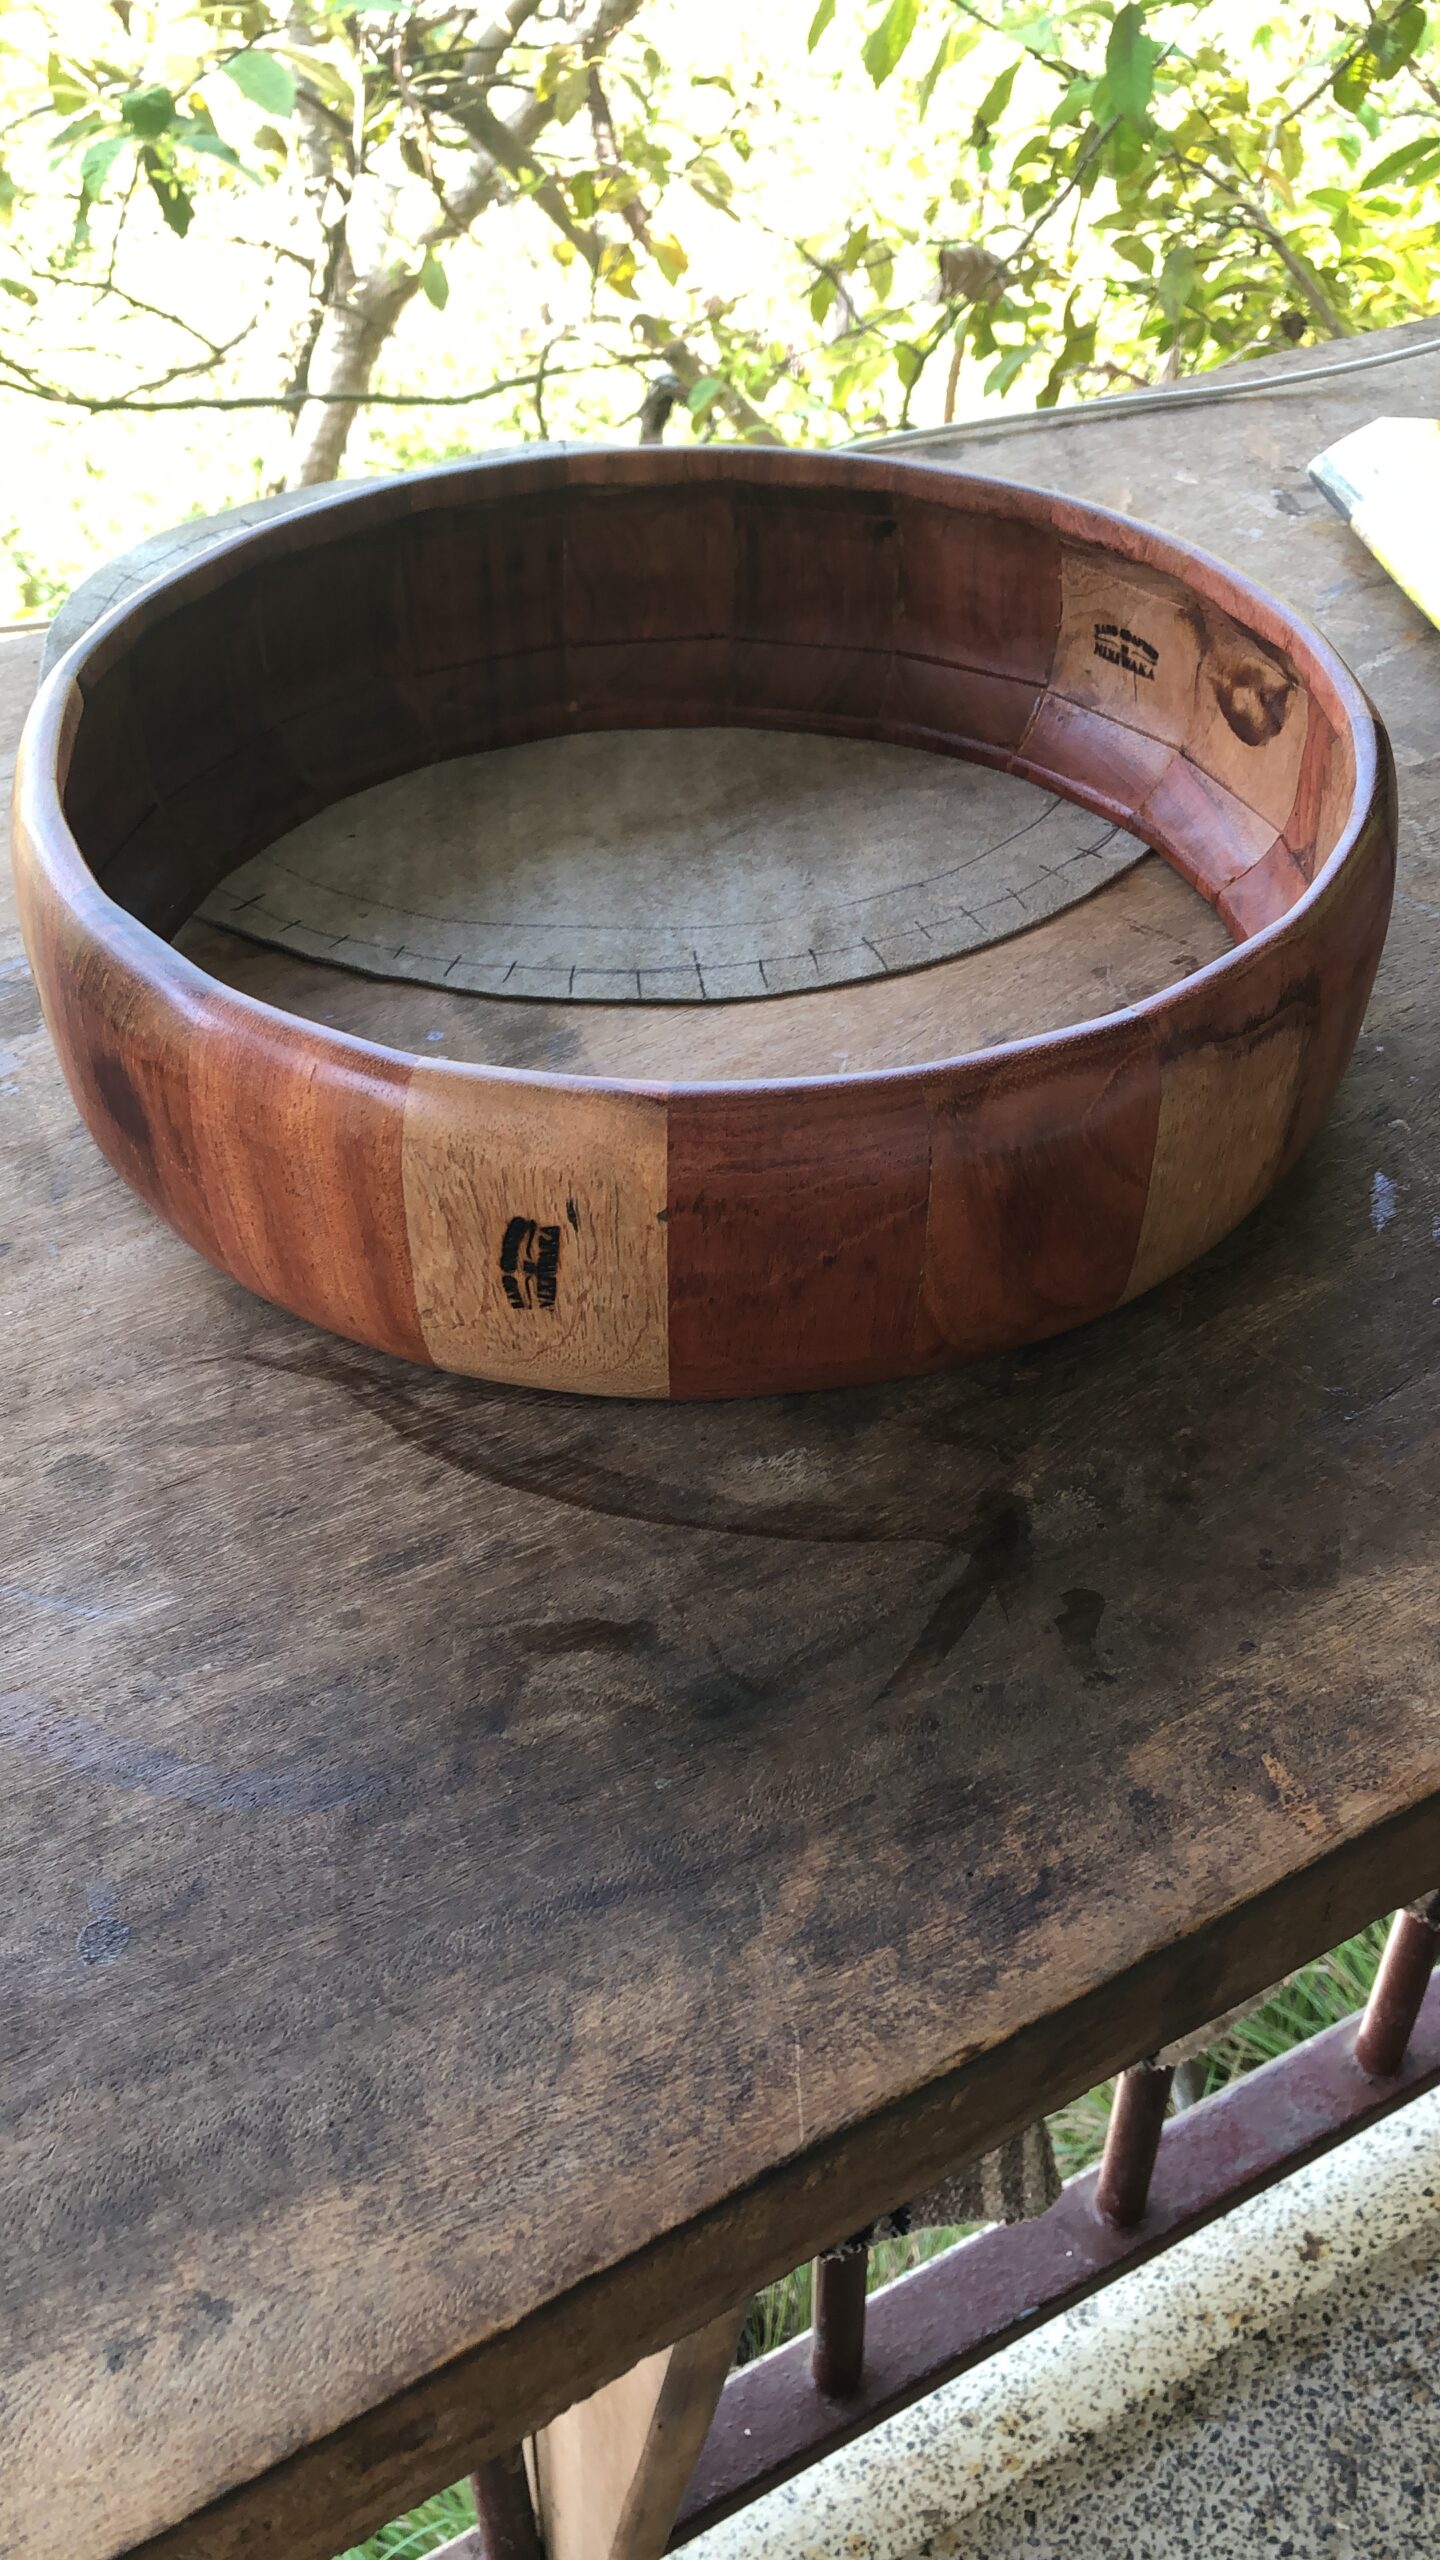
By the time the sanding is done, the drum body has changed character entirely. What was a rough assembly of parts has become a single unified object with clean curves and a surface that reflects light. At this point it already sounds different when you tap it — more focused, more resonant. The wood has found its shape.
The Skin
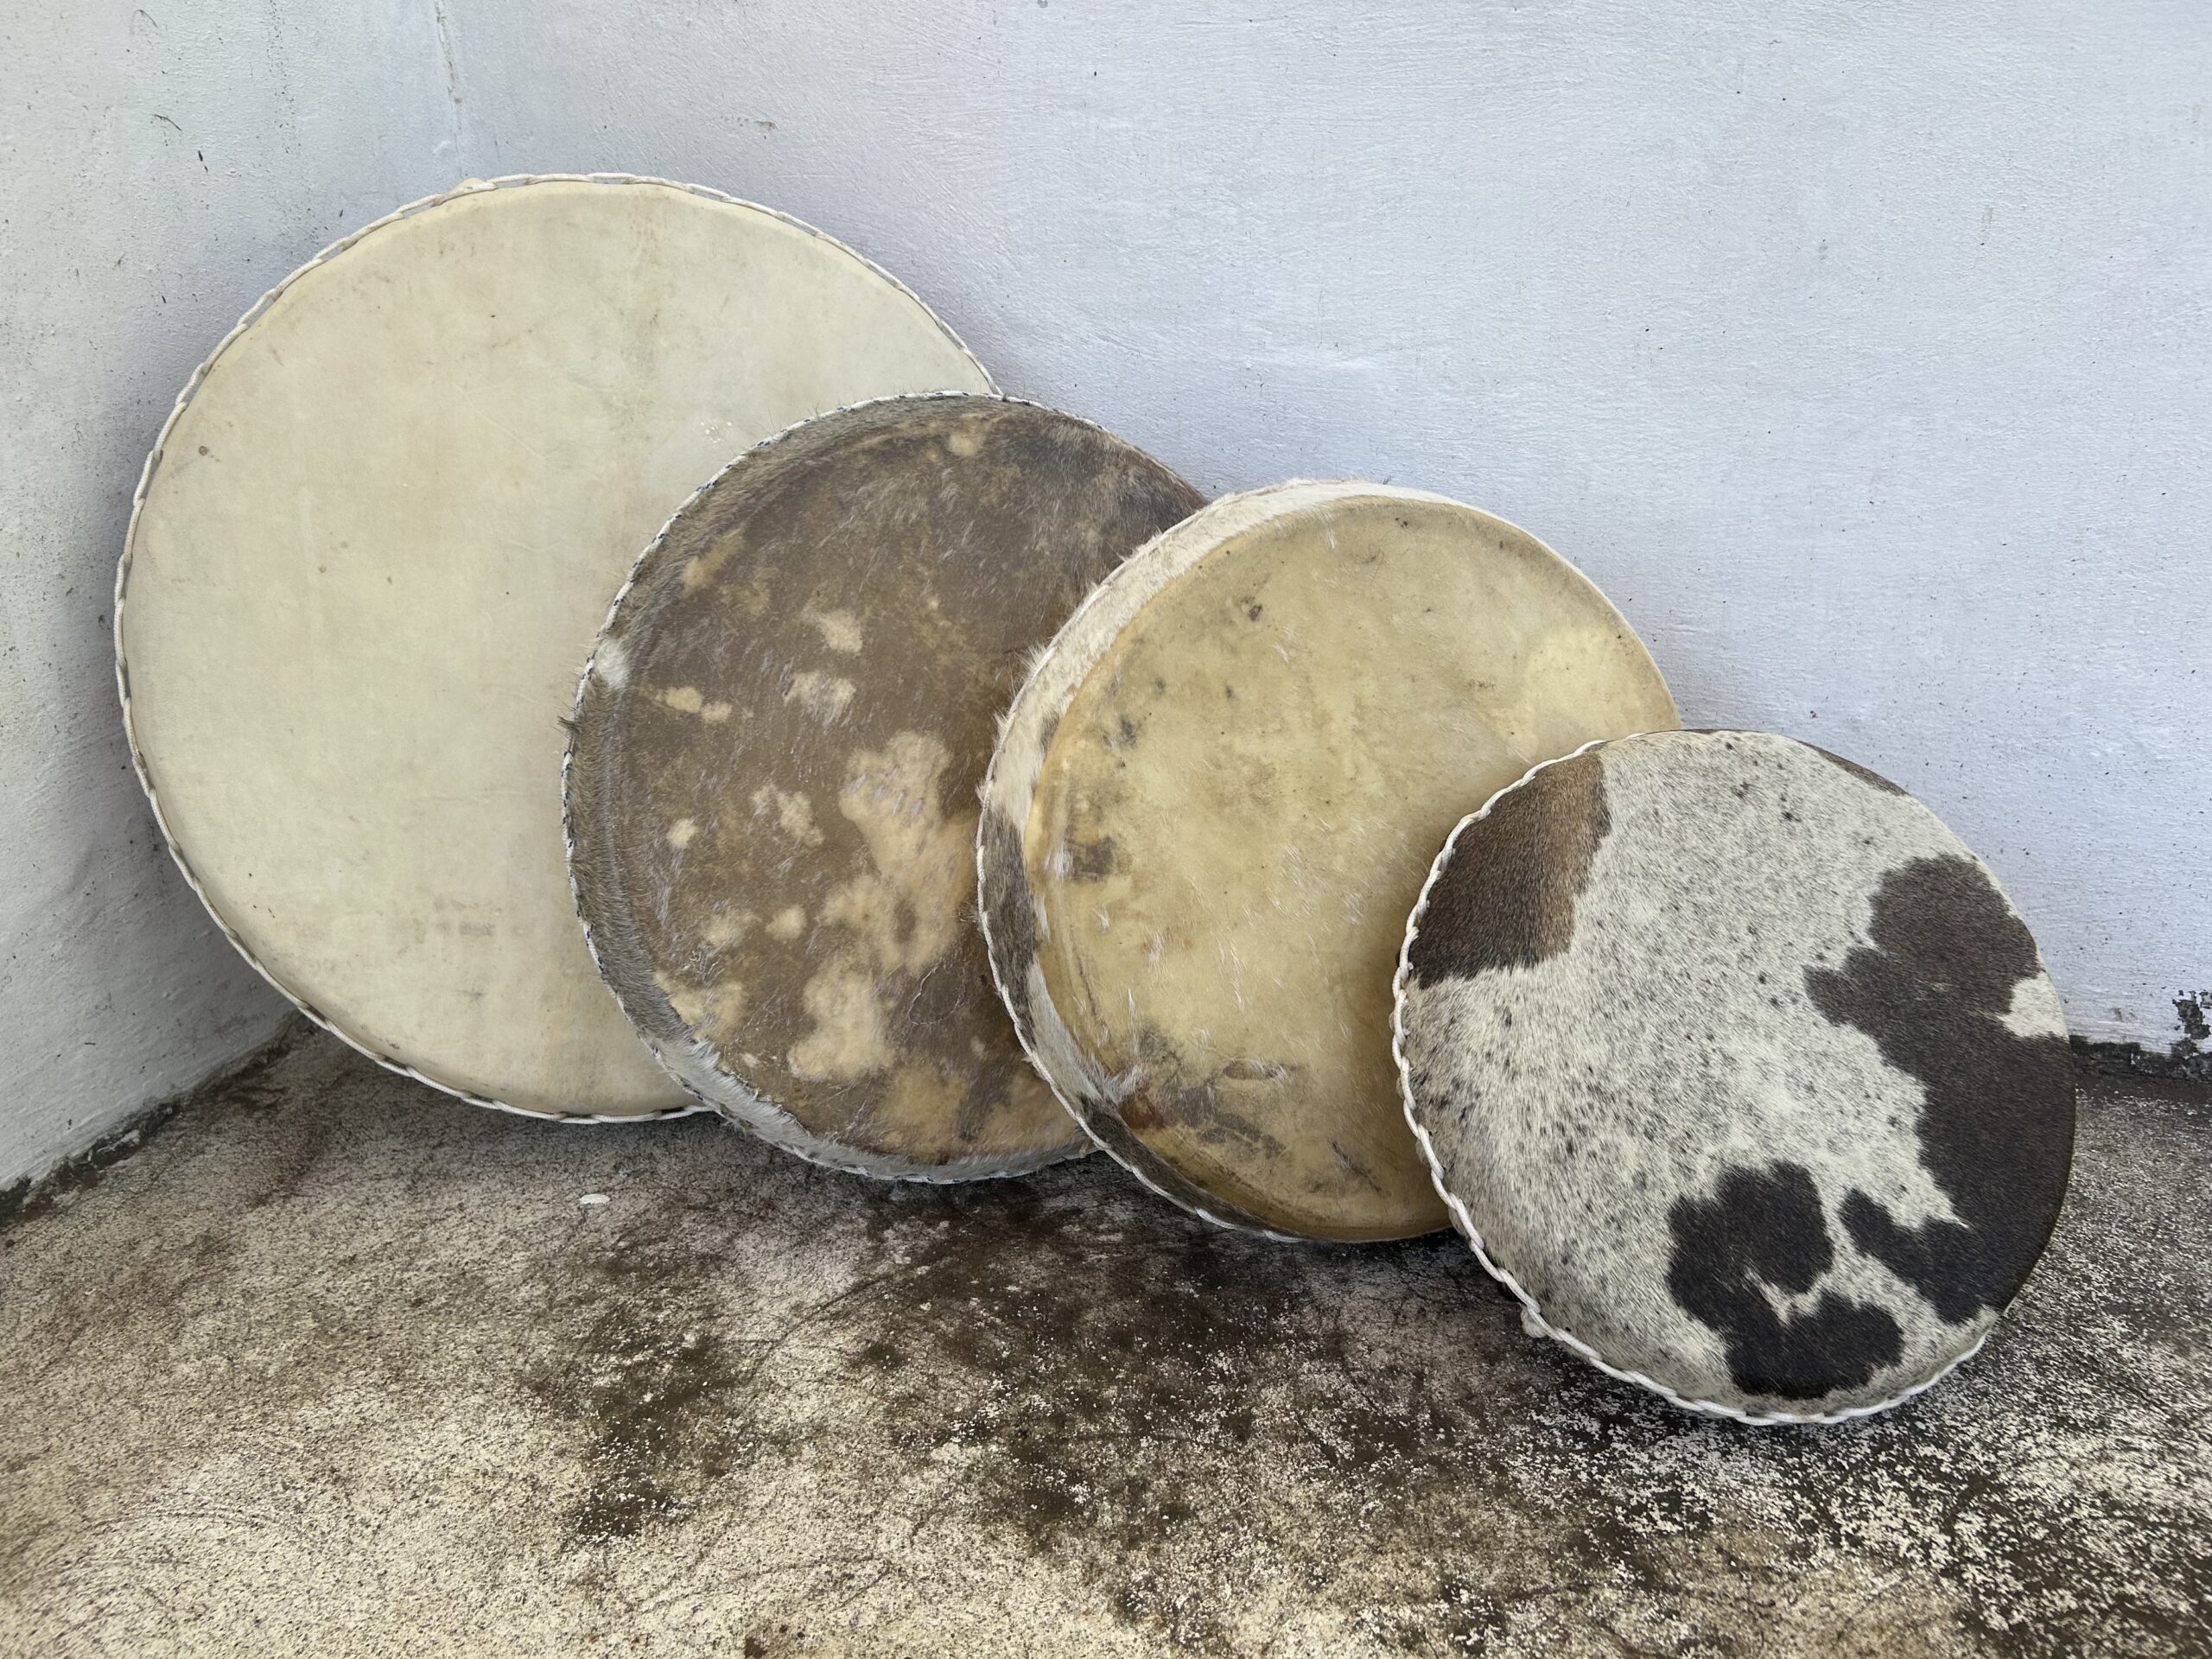
Natural cowhide — selected, prepared, punched
The skin is natural cowhide. I use it because it is what the Zululand builders use, and because after many years of working with it I understand its behaviour — how it tightens in dry heat, how it softens in rain, how long it takes to settle after being stretched. Synthetic heads are more predictable. That predictability is not always a virtue. A cowhide drum has a living quality that I have never been able to replicate with other materials.
Every skin is different. The thickness varies across the hide, and the tone varies with it. I select skins that have a good overall thickness and soak them before working with them, which makes the hide pliable and allows it to stretch without tearing.
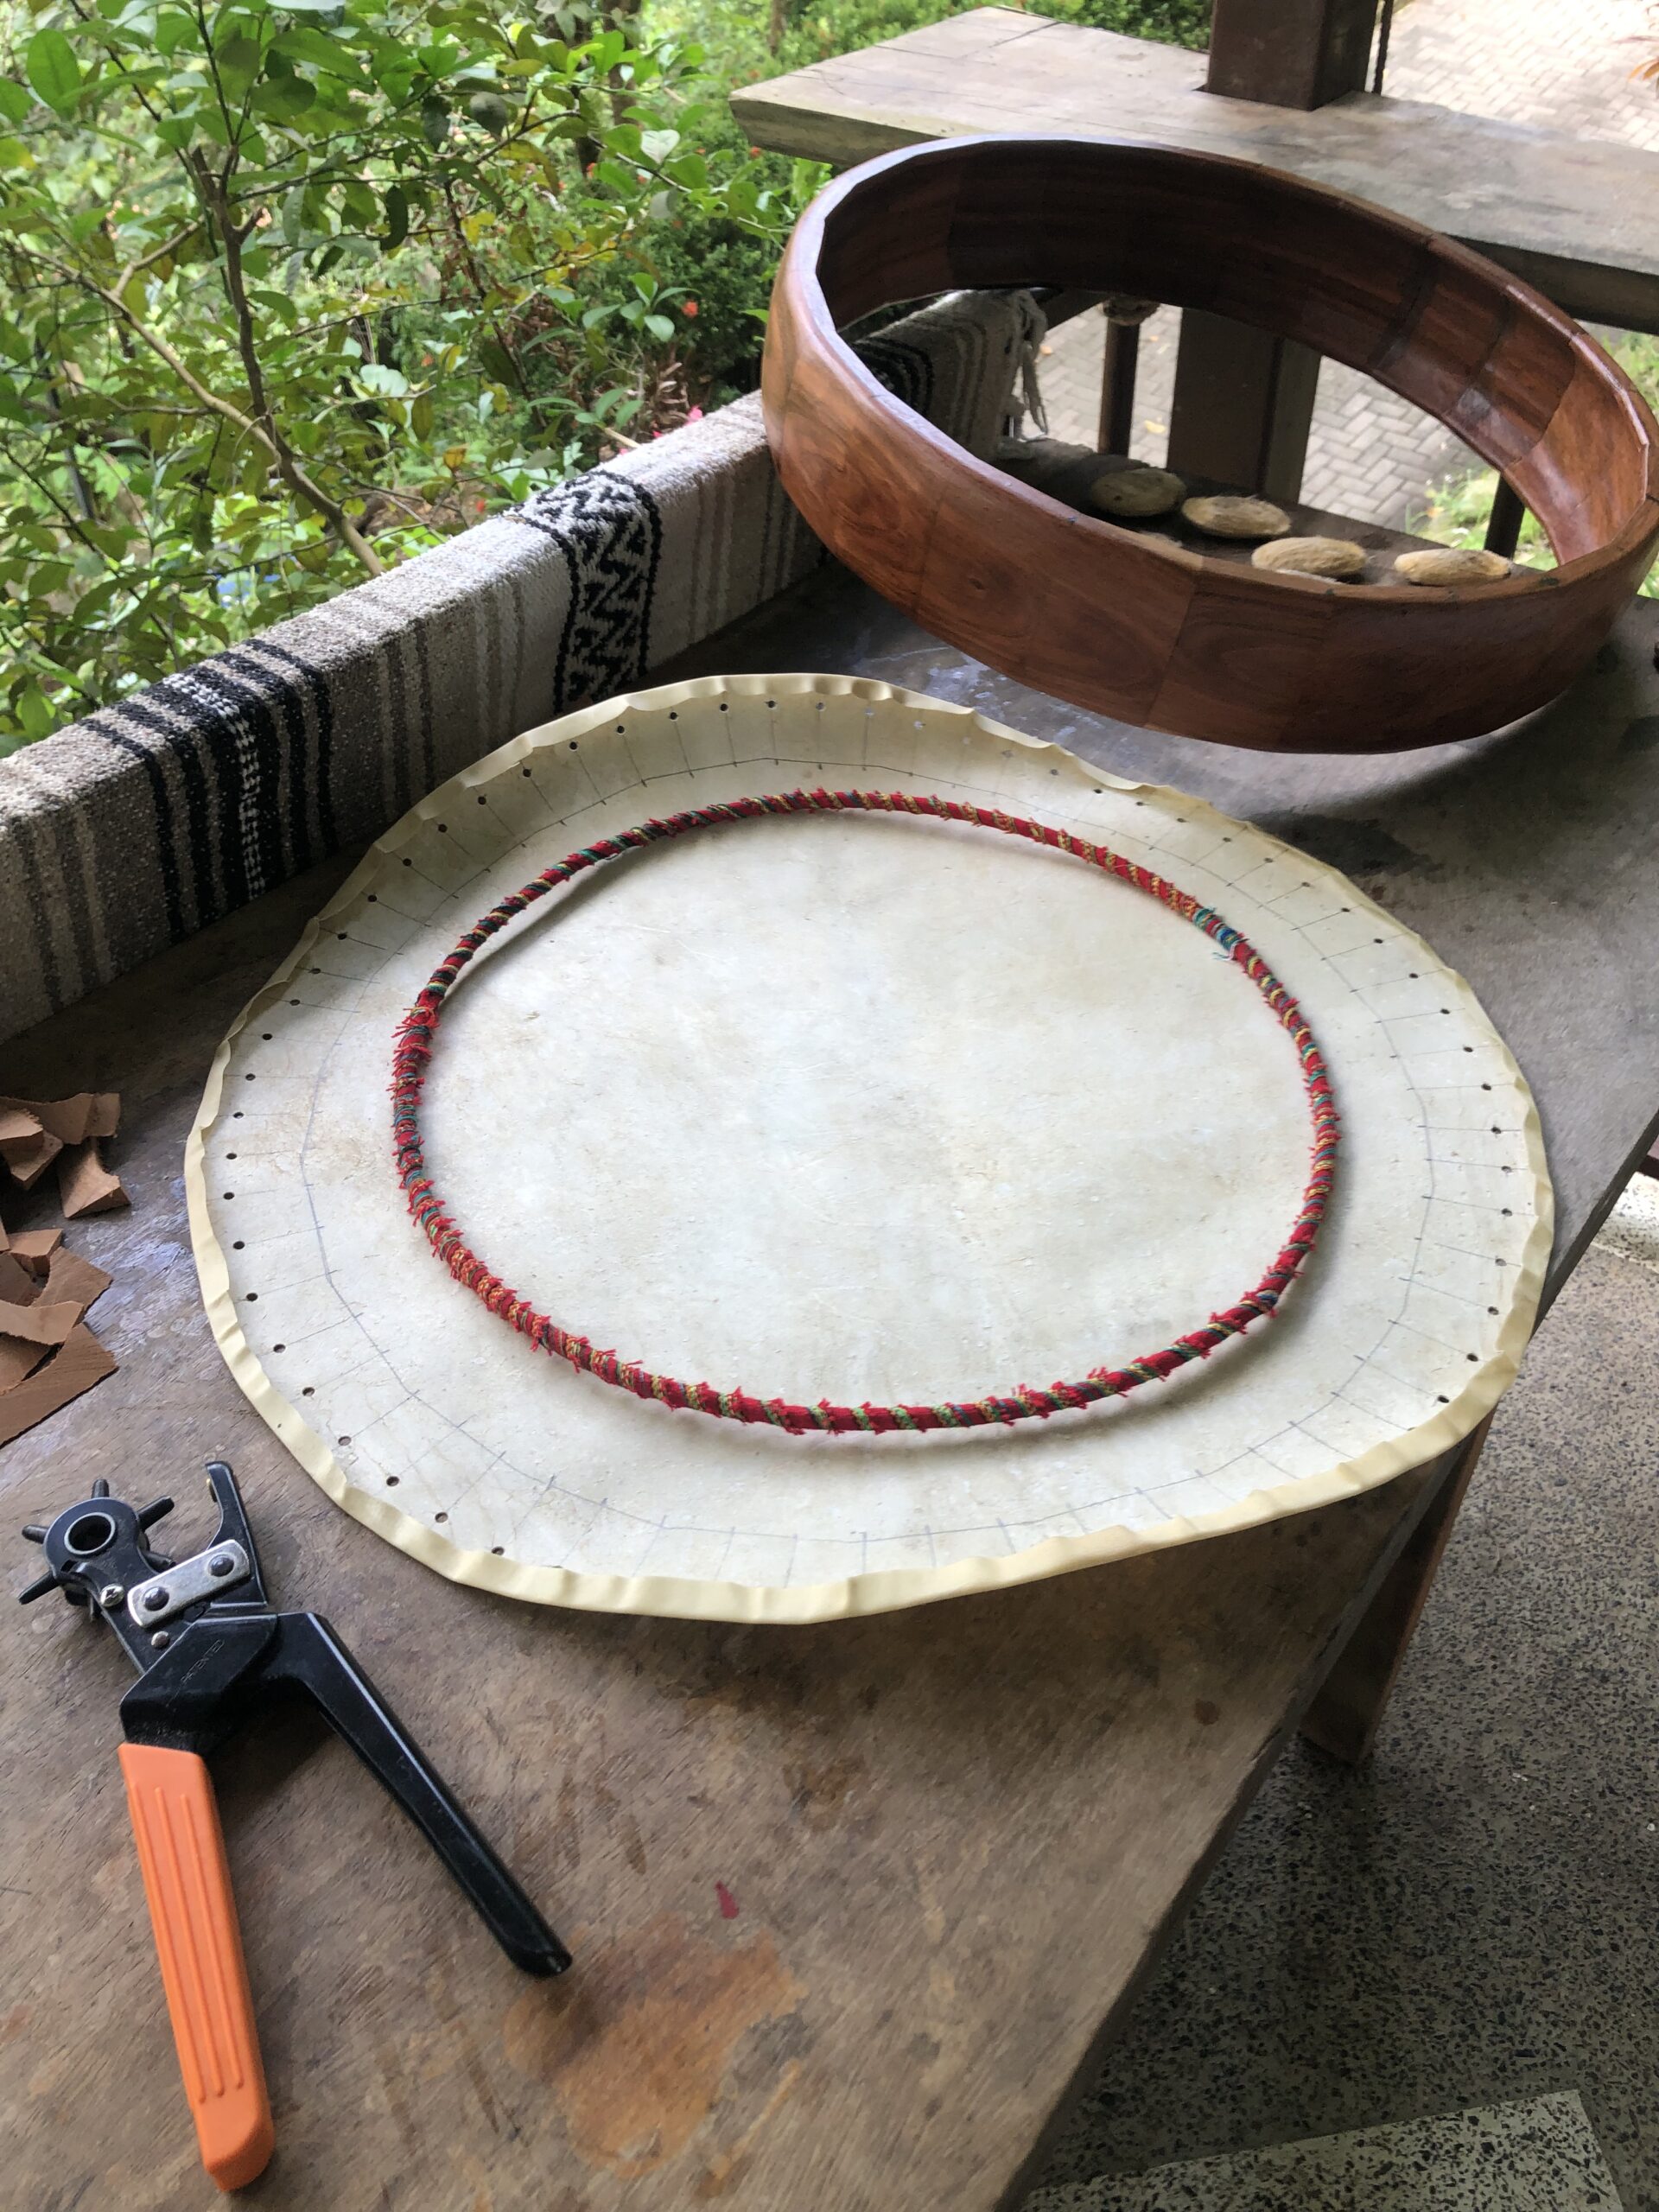
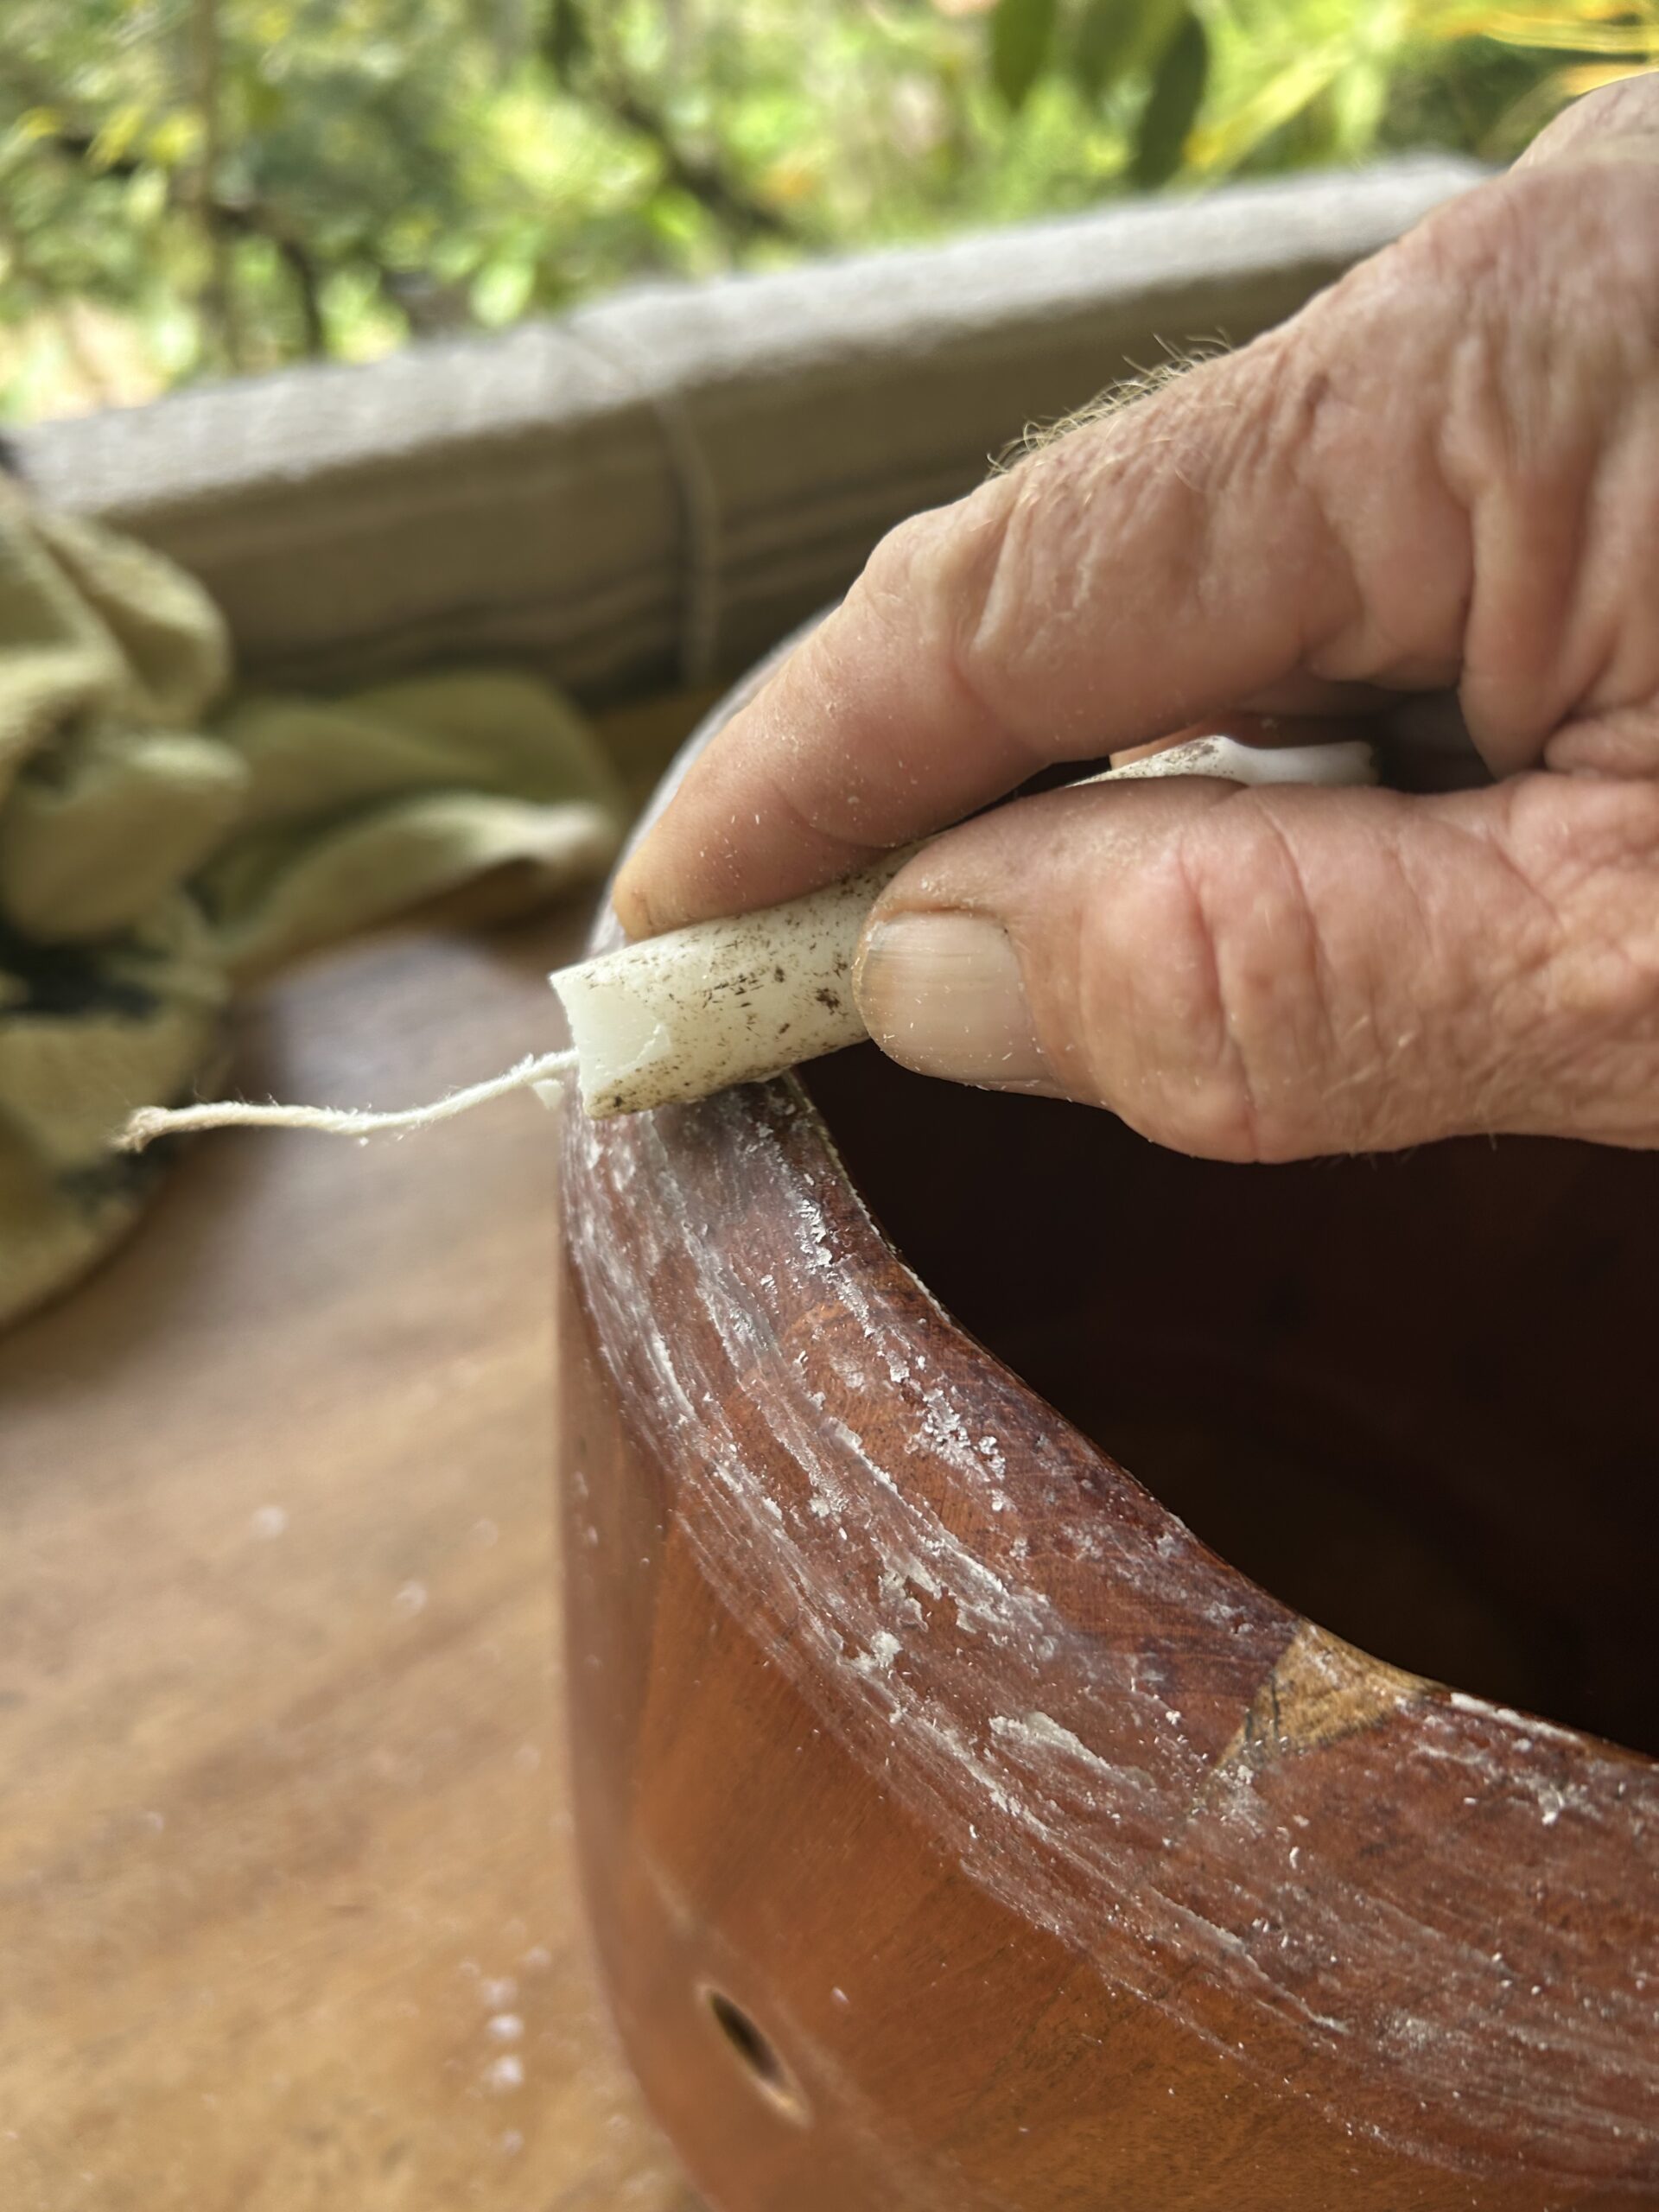
Once the skin is clean and stretched flat, holes are punched around the perimeter at even intervals. These are the anchor points for the rope system — the path through which all the tension will eventually travel. The spacing has to be consistent. If the holes are uneven, the tension will pull unevenly, and the skin will distort. I mark the spacing before I punch, and I check it twice.
At the centre of the prepared skin I place the ring — a circle of braided rope wrapped tightly in coloured cord. This ring sits at the bottom edge of the drum body once the skin is mounted. It is the anchor against which the lacing pulls: the thing that transmits tension from the skin downward through the rope system and into the frame. It needs to be strong, and it needs to hold its shape under load.
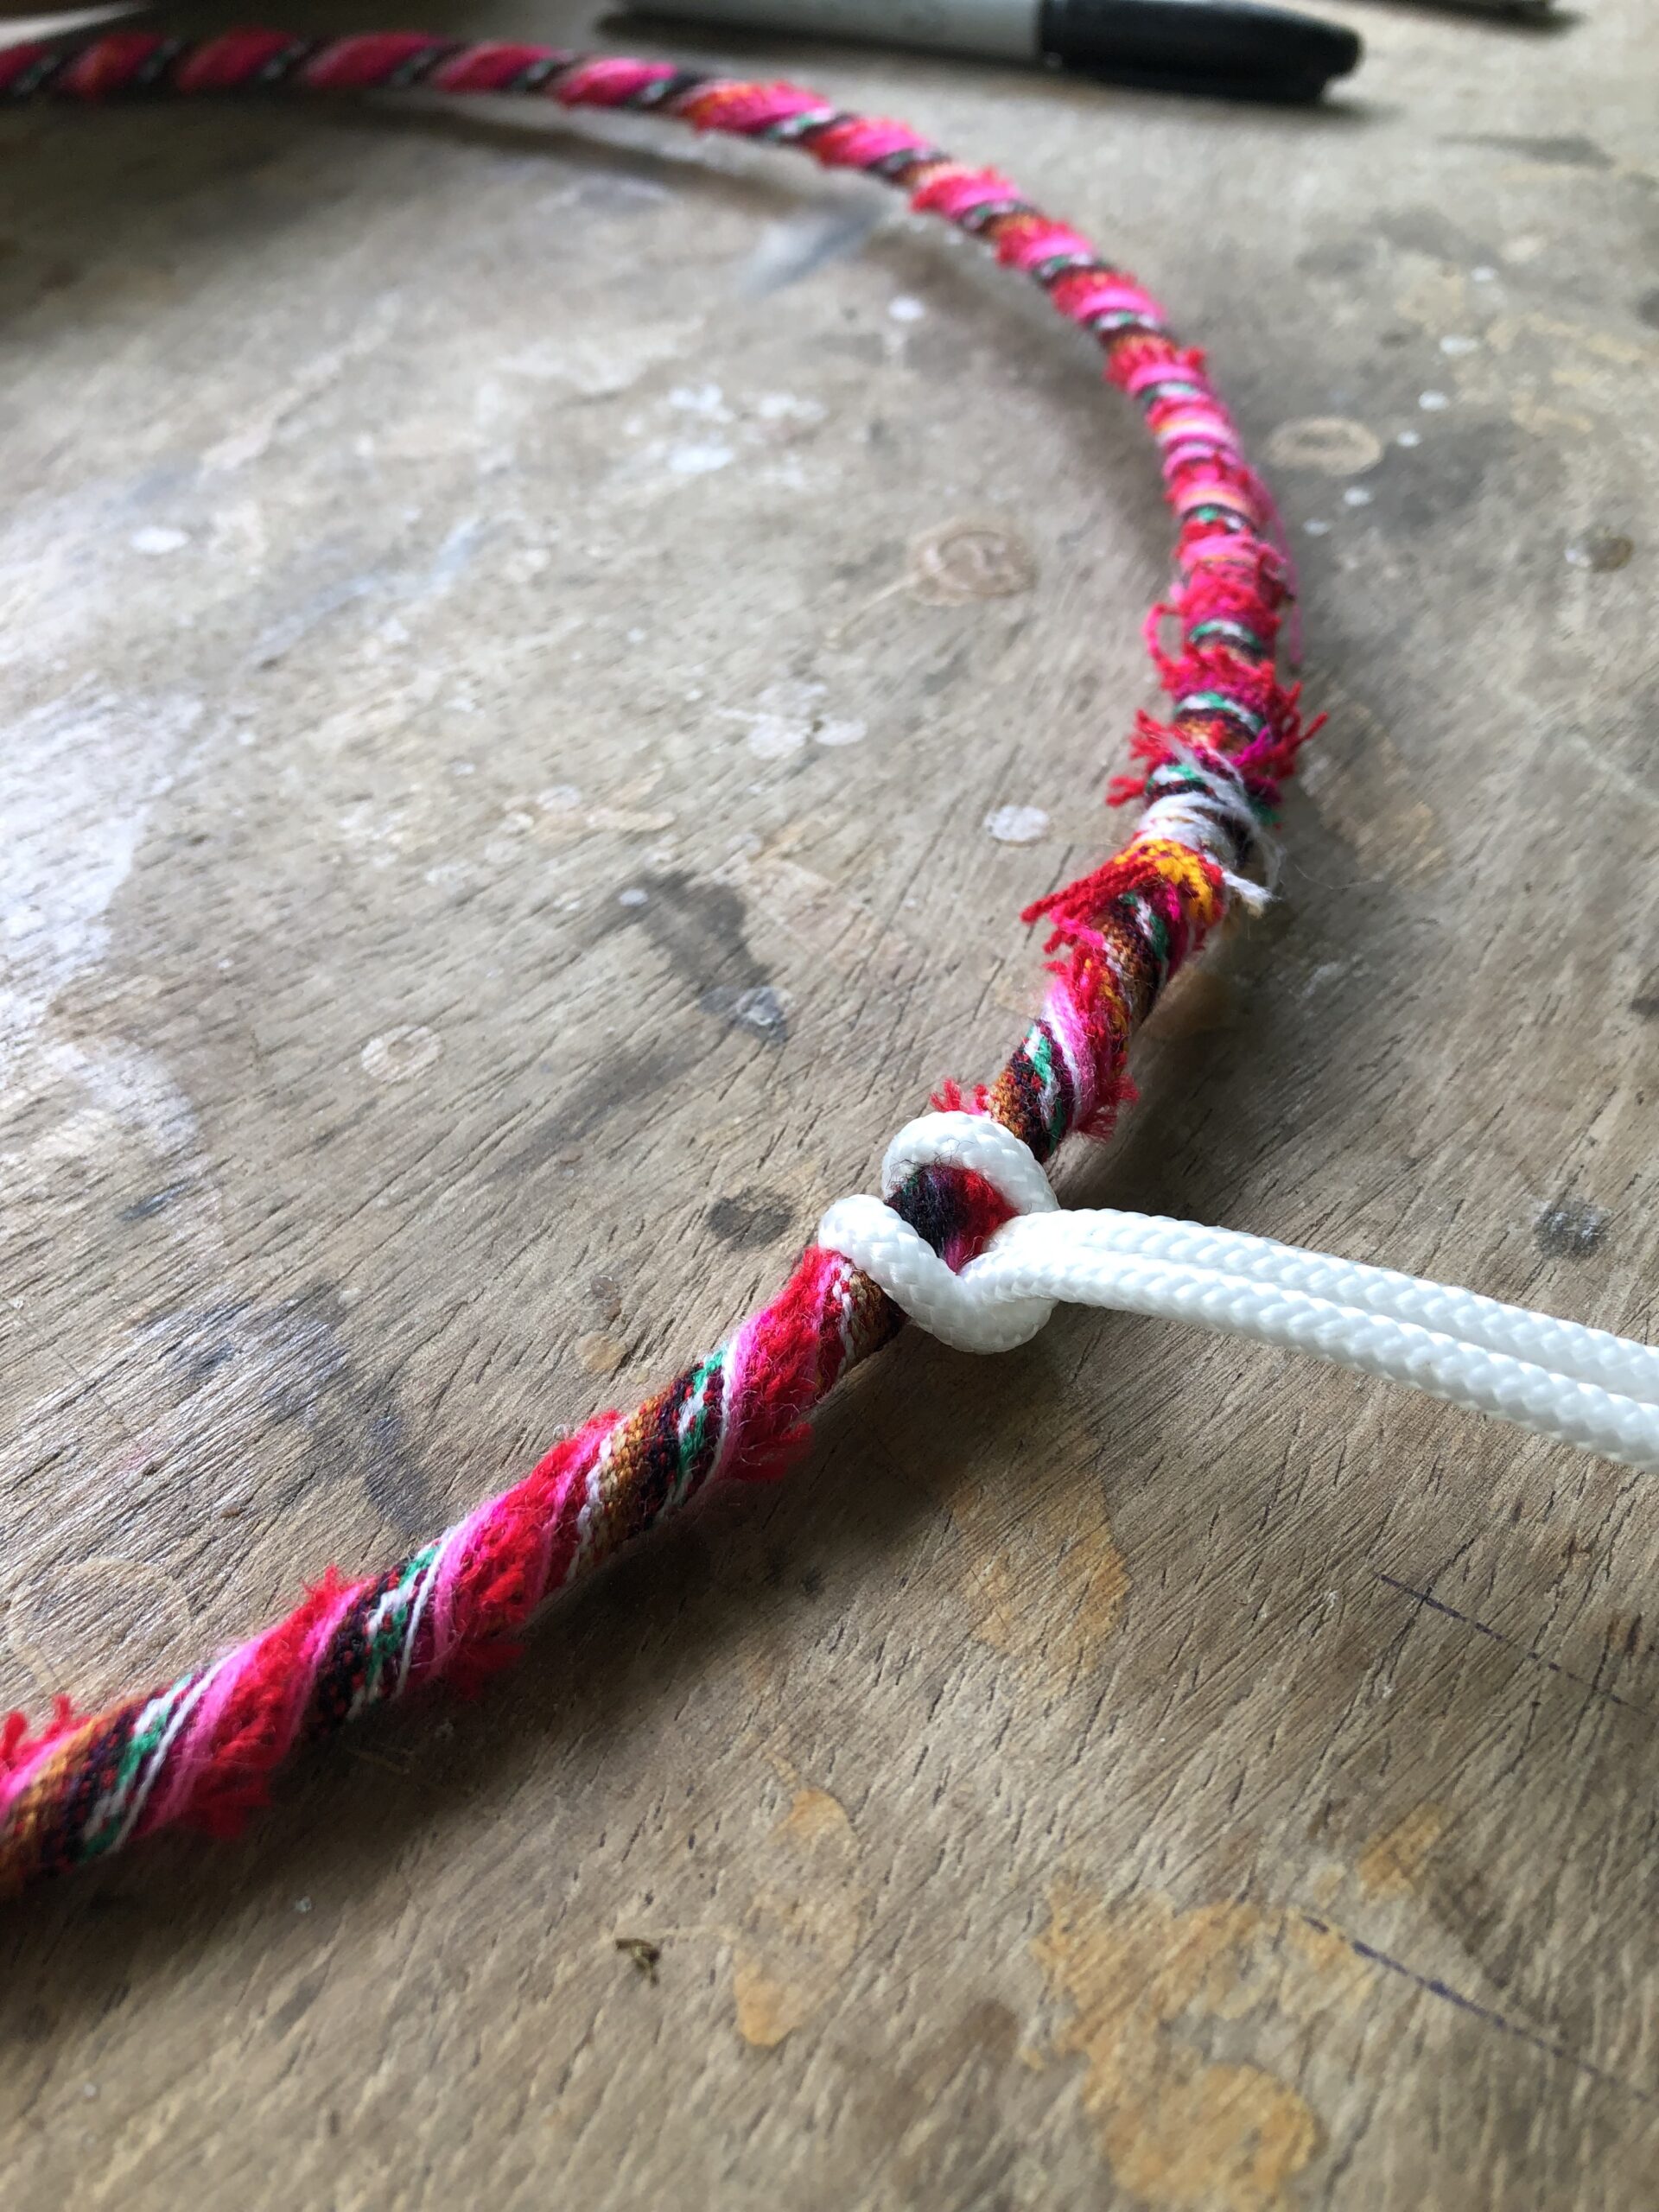
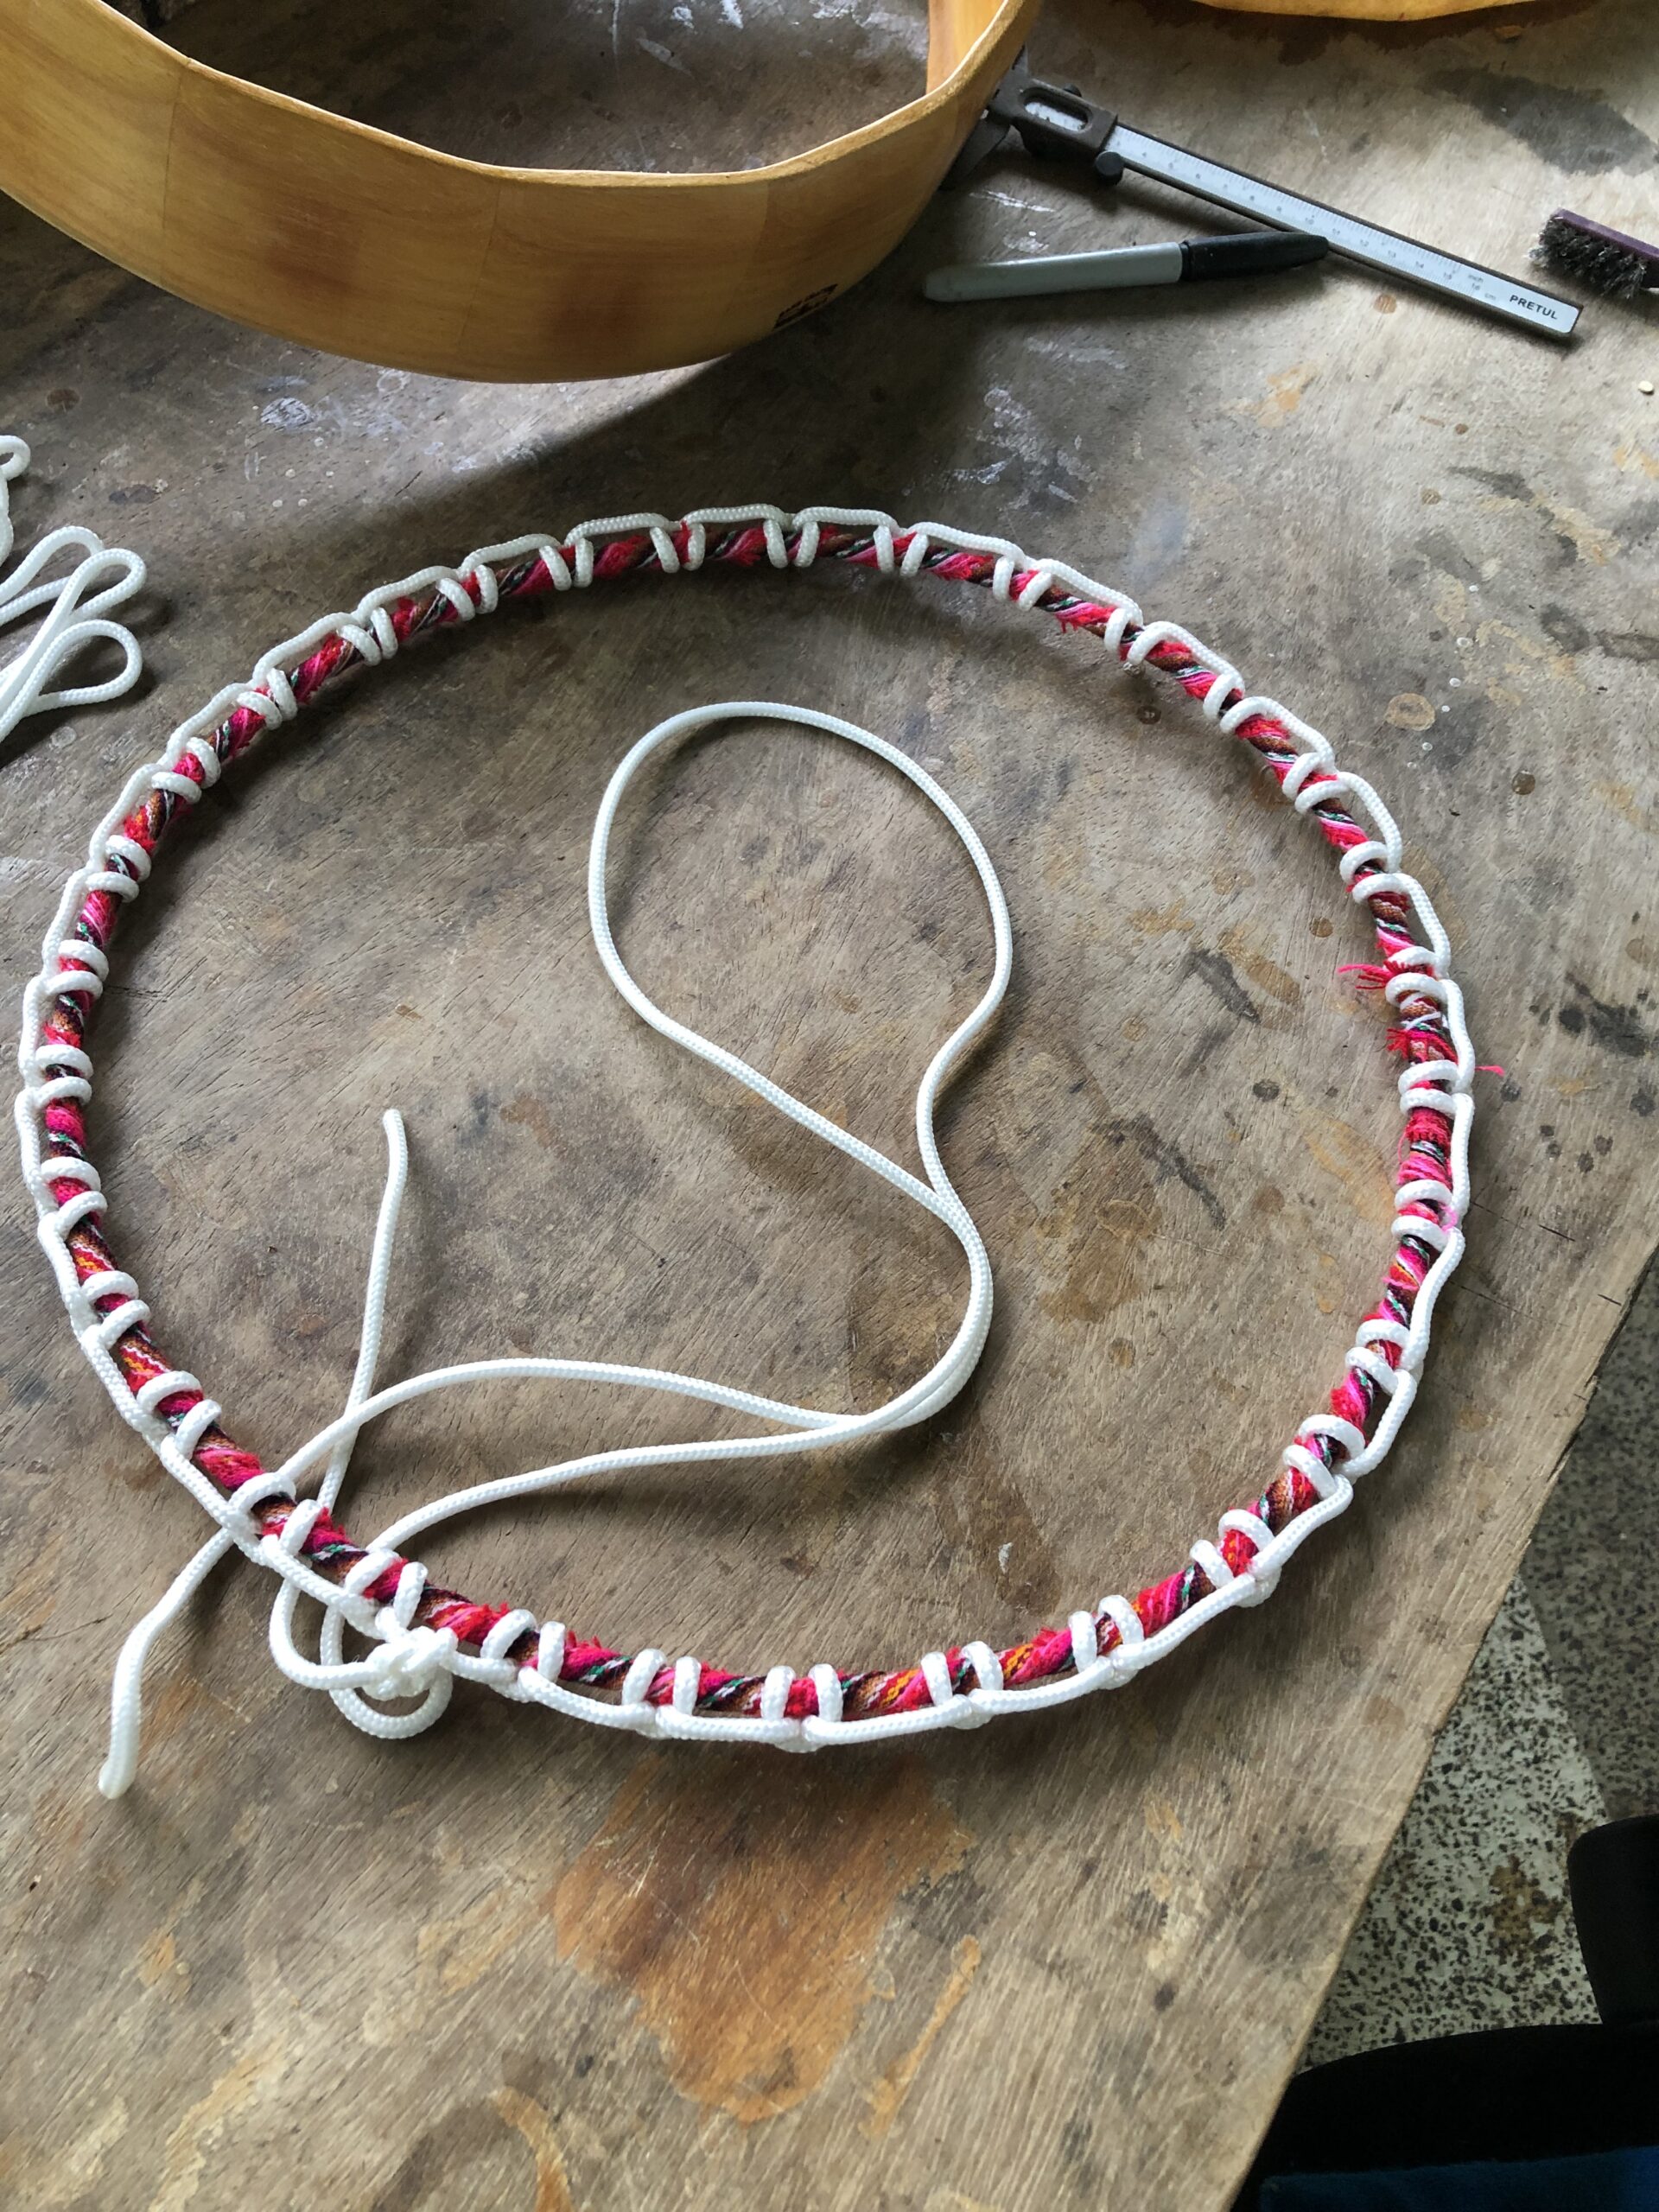
The ring is made by wrapping a core of rope tightly in multicoloured cord until it is dense and firm, then threading the white lacing rope through it at intervals that match the holes in the skin. When this is done, the ring and the skin are effectively one object — the skin pulls, the ring holds, the rope transmits. This system is old, and it works.
The Rings & Rope System
Tunable by hand · Built for humid conditions
Before the skin goes on, the drum body receives a treatment at its edges — a rubbing of wax or a natural conditioning paste where the rope will sit. Over time the rope wears into the frame, and without this treatment the wood would eventually compress or split at the contact points. It is a small step. It extends the life of the drum by years.
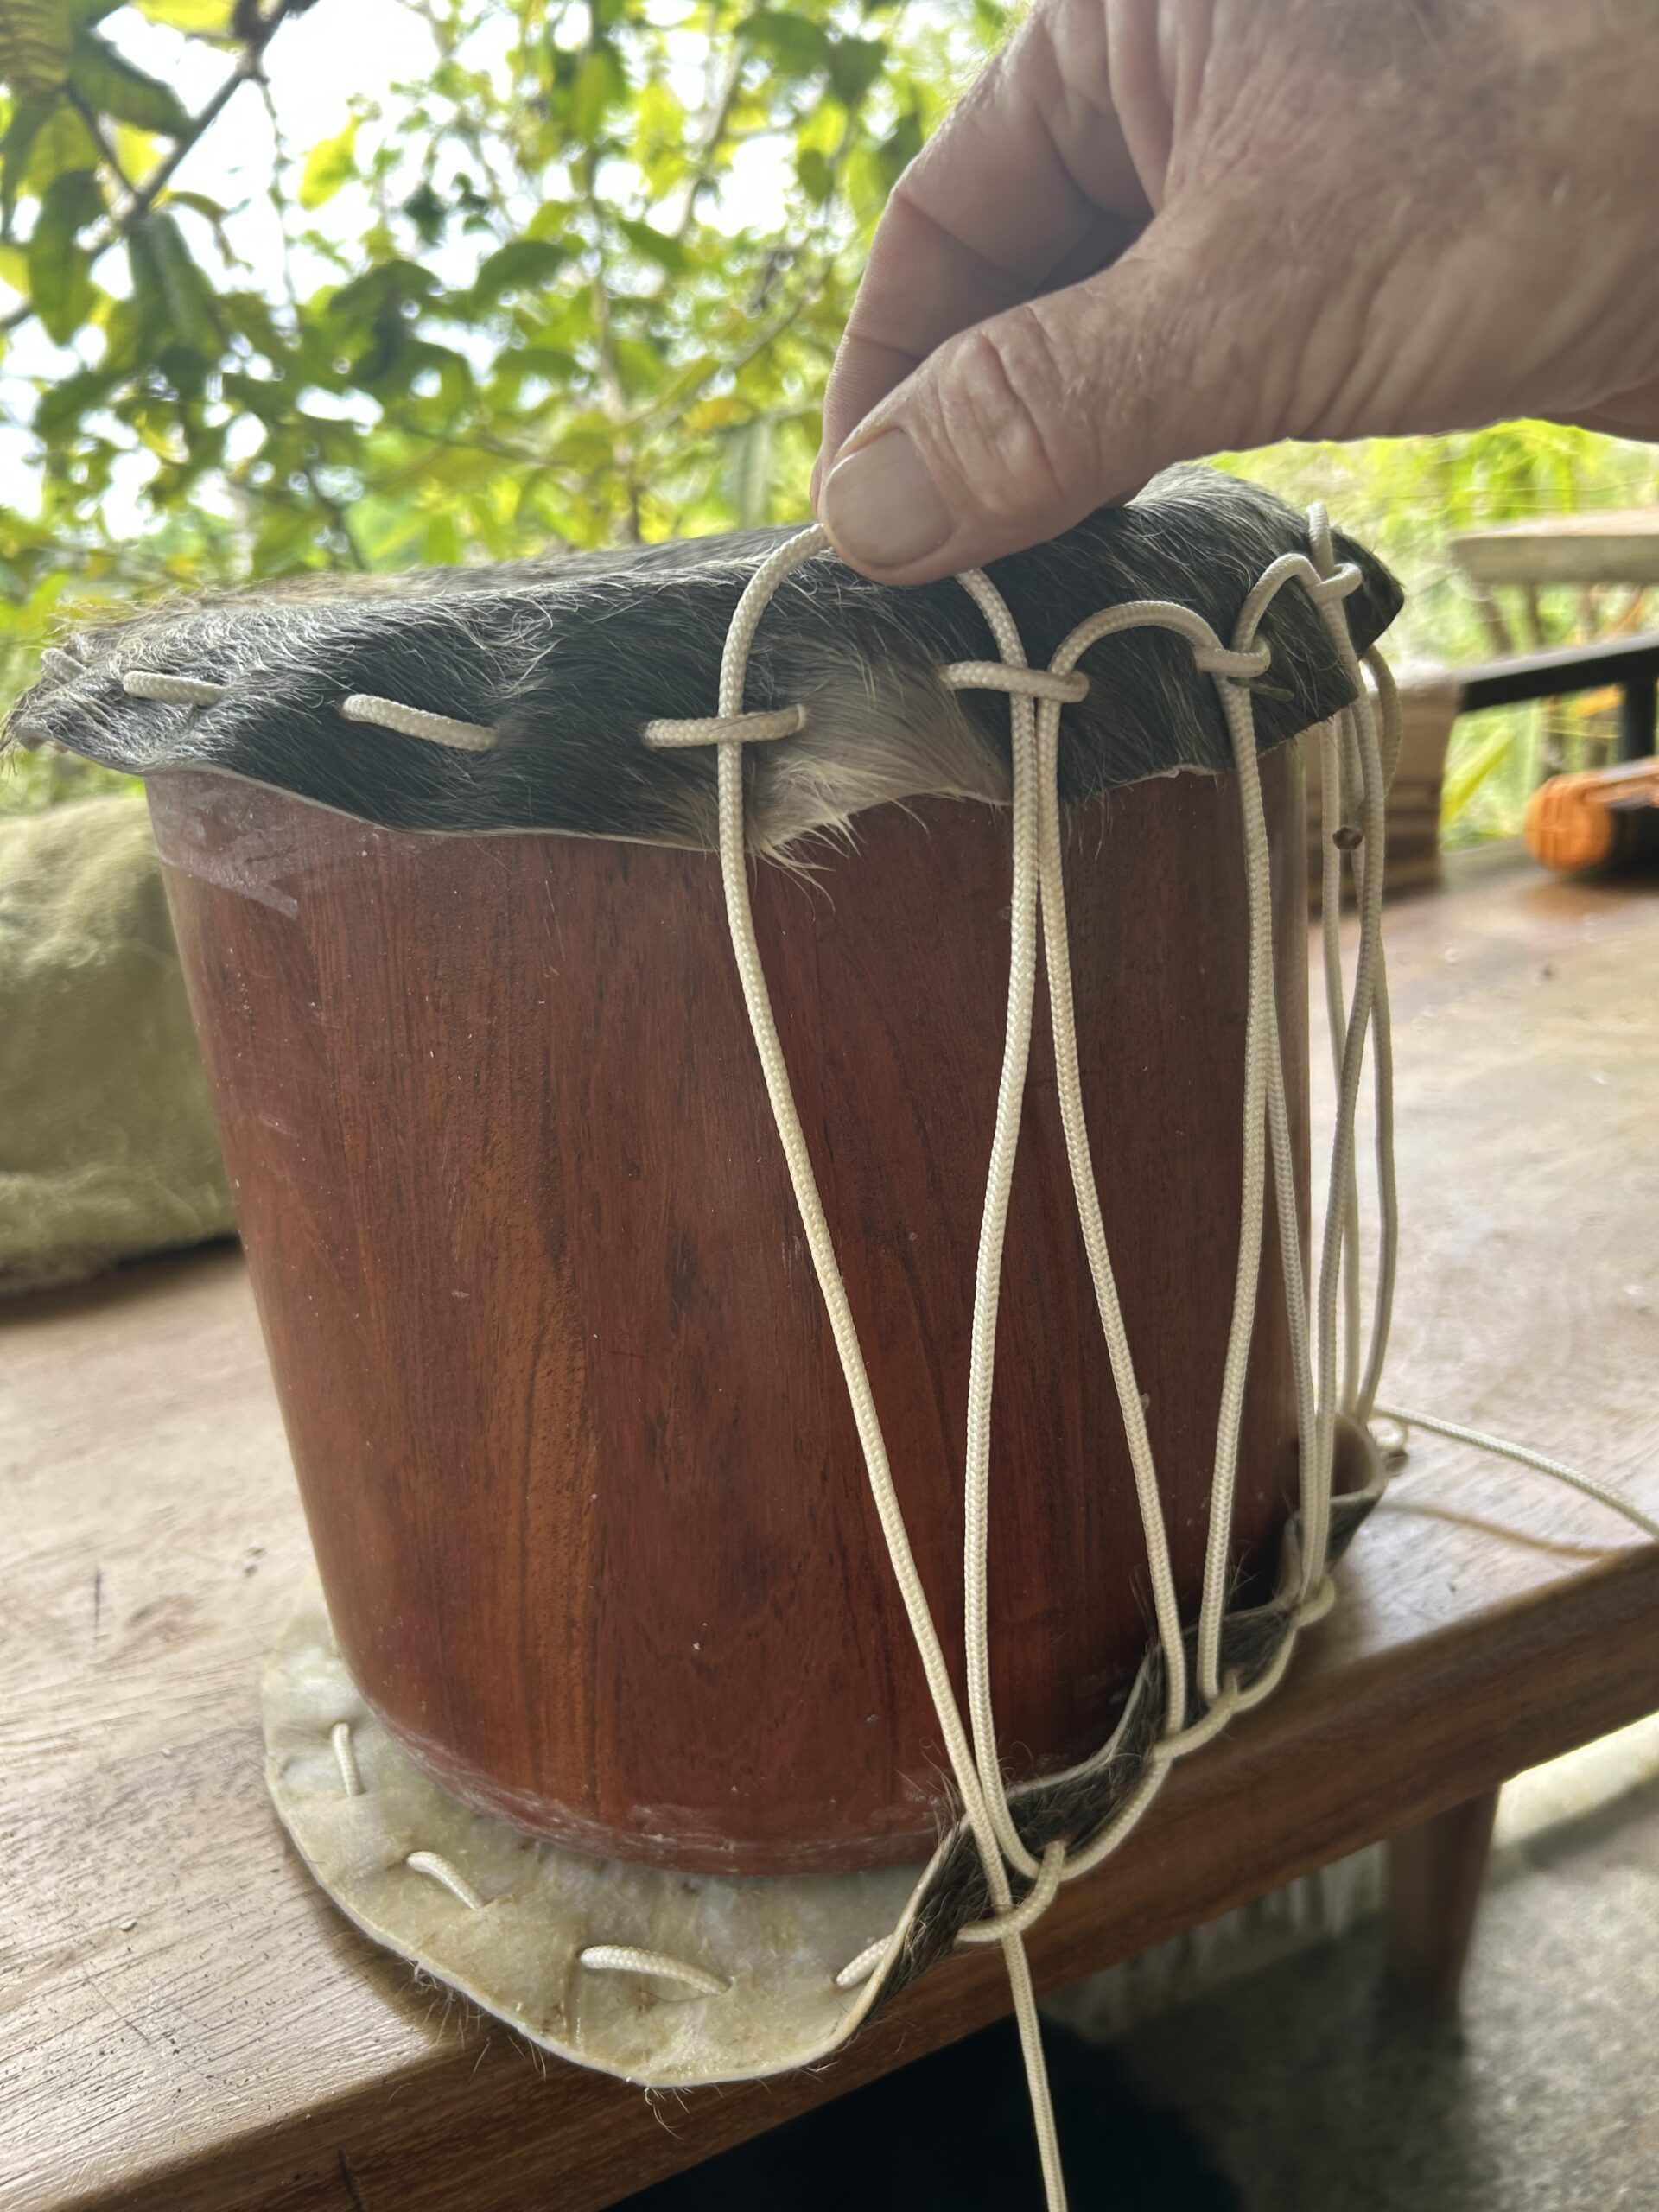
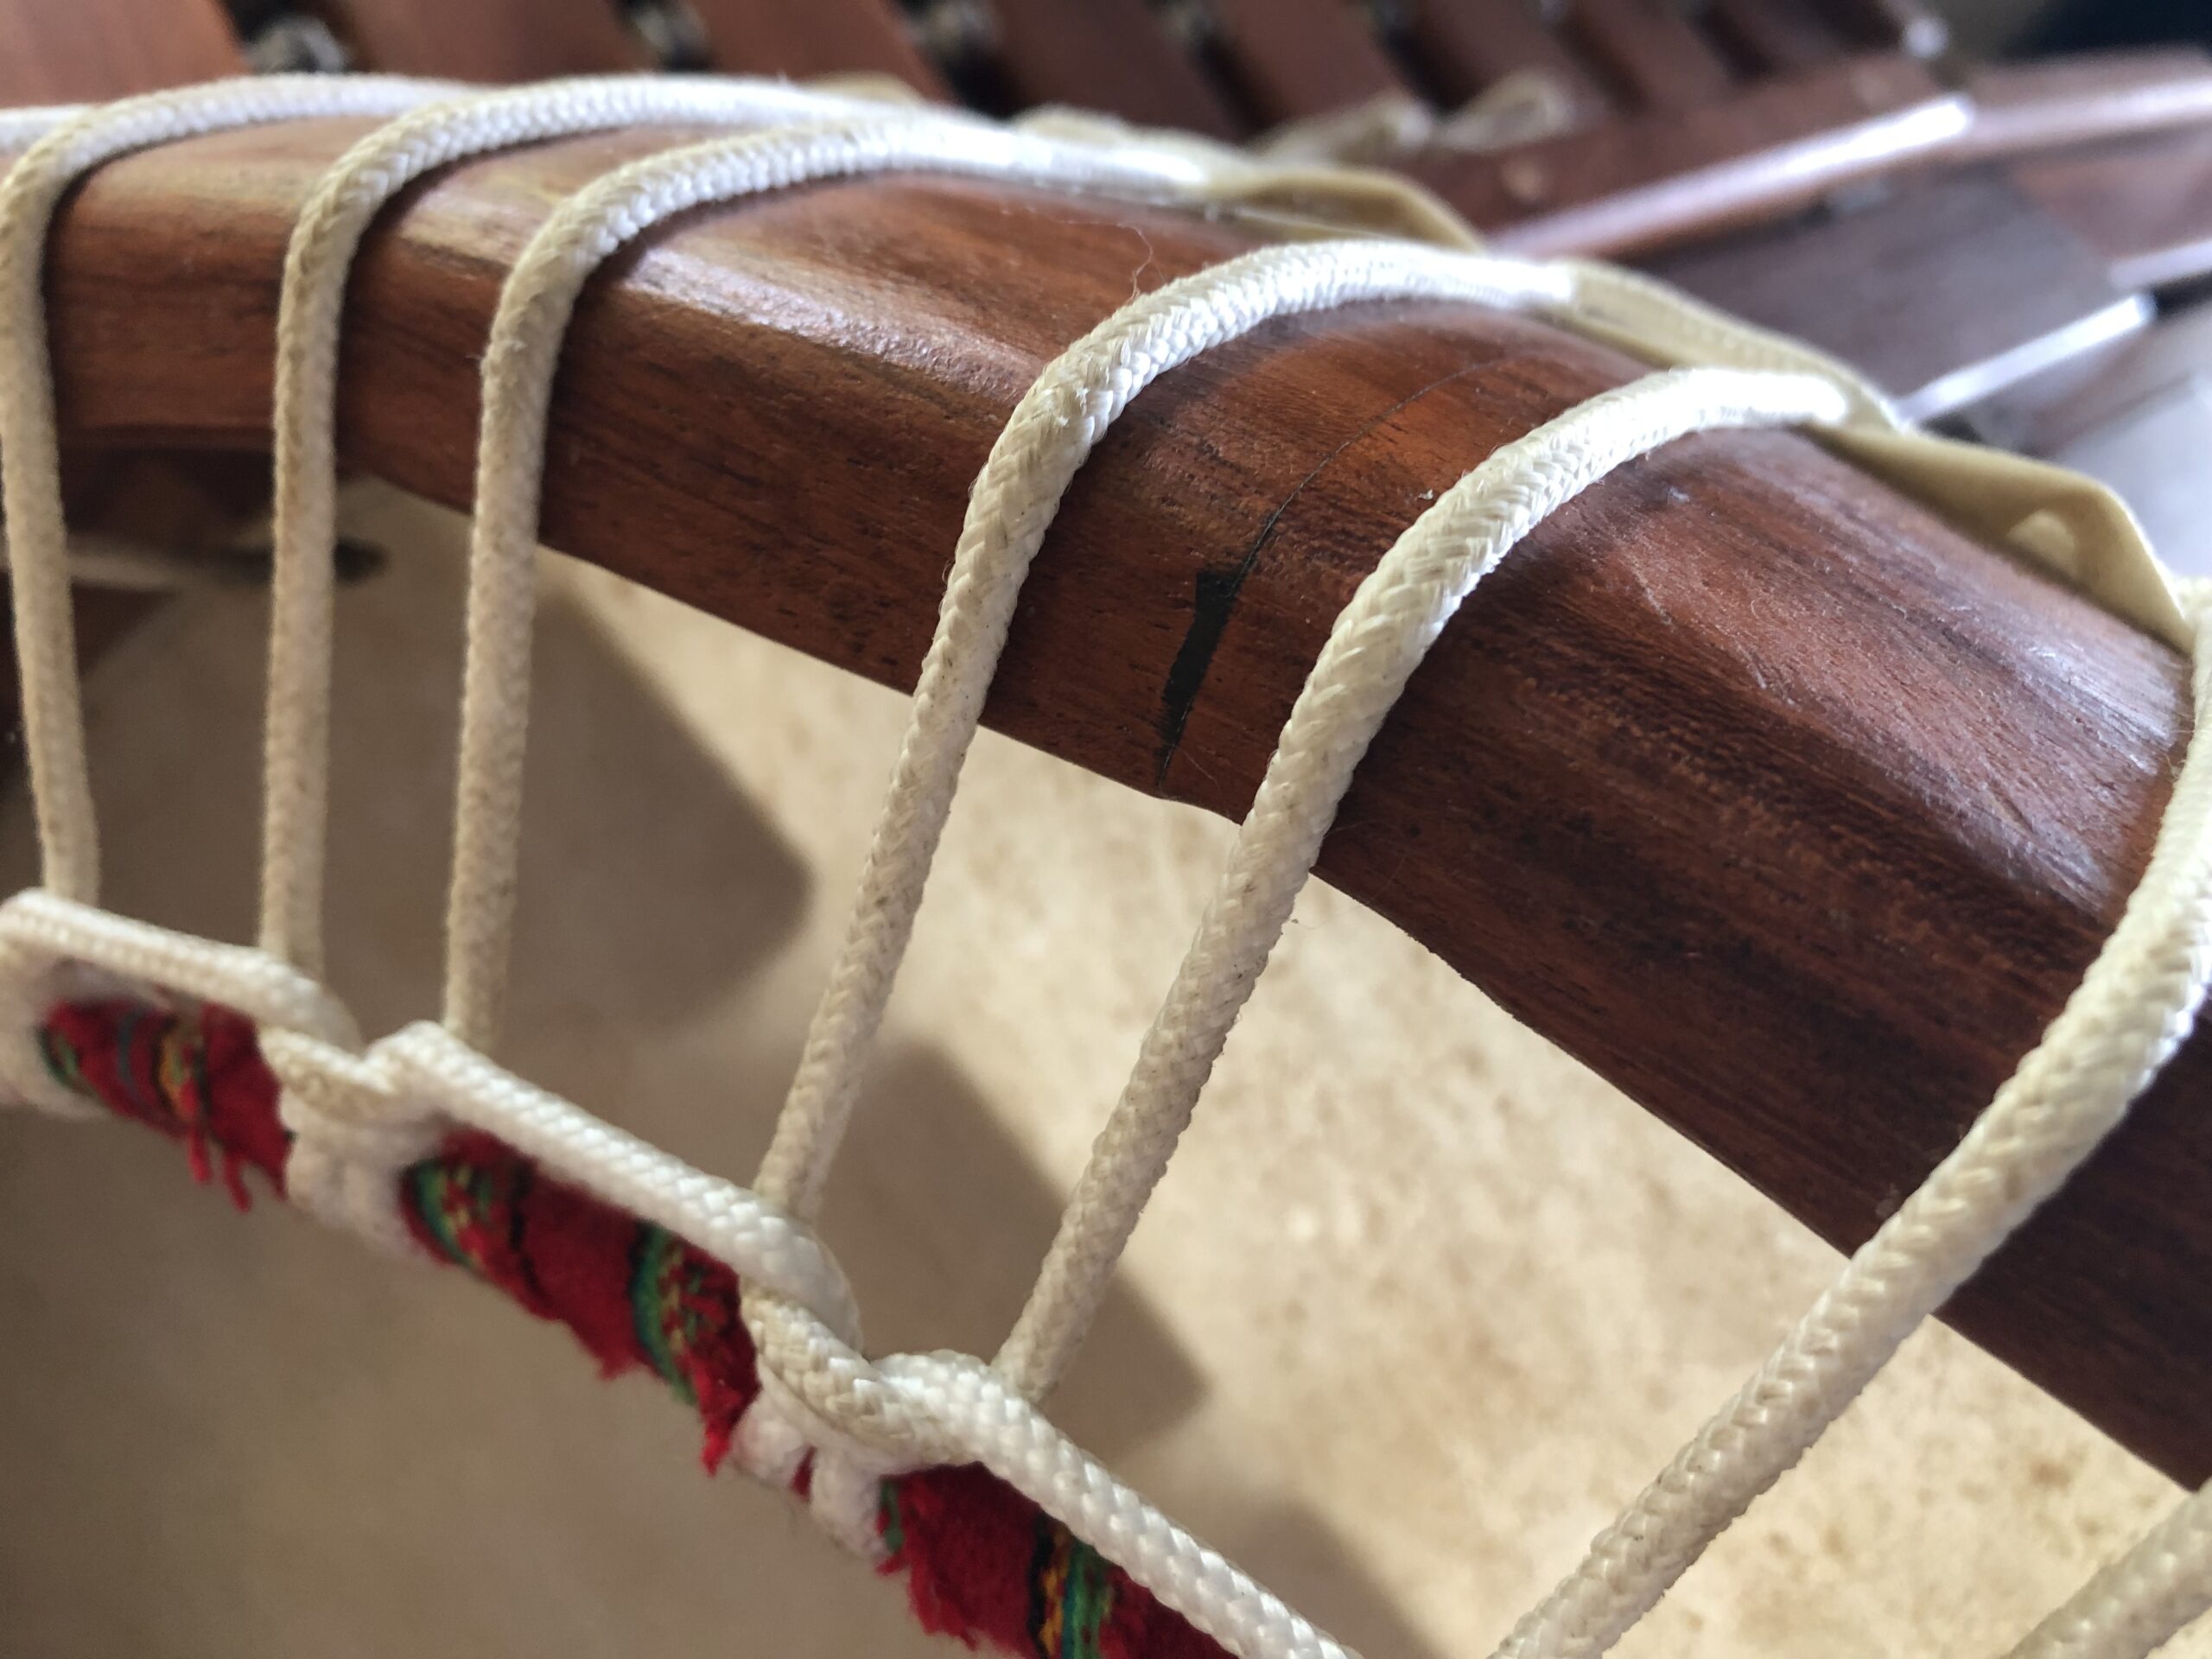
Mounting the skin is the most demanding part of the build. The hide, still damp from soaking, is laid over the top of the drum body. The rope threads from each hole in the skin down through the ring at the bottom, then back up in a V-pattern that wraps around the body. This lacing is done by hand, hole by hole, and it must be done evenly — equal tension on each leg of each V, equal spacing between them, no twist in the rope that would cause it to lie unevenly.
When all the ropes are threaded but not yet tightened, the drum looks temporary — the skin loose, the ropes hanging. Then comes the pulling. Each rope is worked gradually, a little at a time, moving around the drum so the tension builds evenly across the whole skin. Pull too fast, or pull only in one place, and the skin will seat crookedly. This stage takes patience. I move around the drum many times before I am satisfied that the tension is even.
The reason for this system — rather than a fixed, glued, or tacked skin — is humidity. In a tropical rainforest, the air is rarely the same humidity two days in a row. A skin that is tuned correctly in the dry season will go slack in the wet one. A rope-laced drum can be tightened or loosened by working the ropes, adjusting the tension to suit the conditions. I have played these drums in the rain, in the heat, and in the cold mountain air of the highlands. They hold. They can always be brought back into pitch.
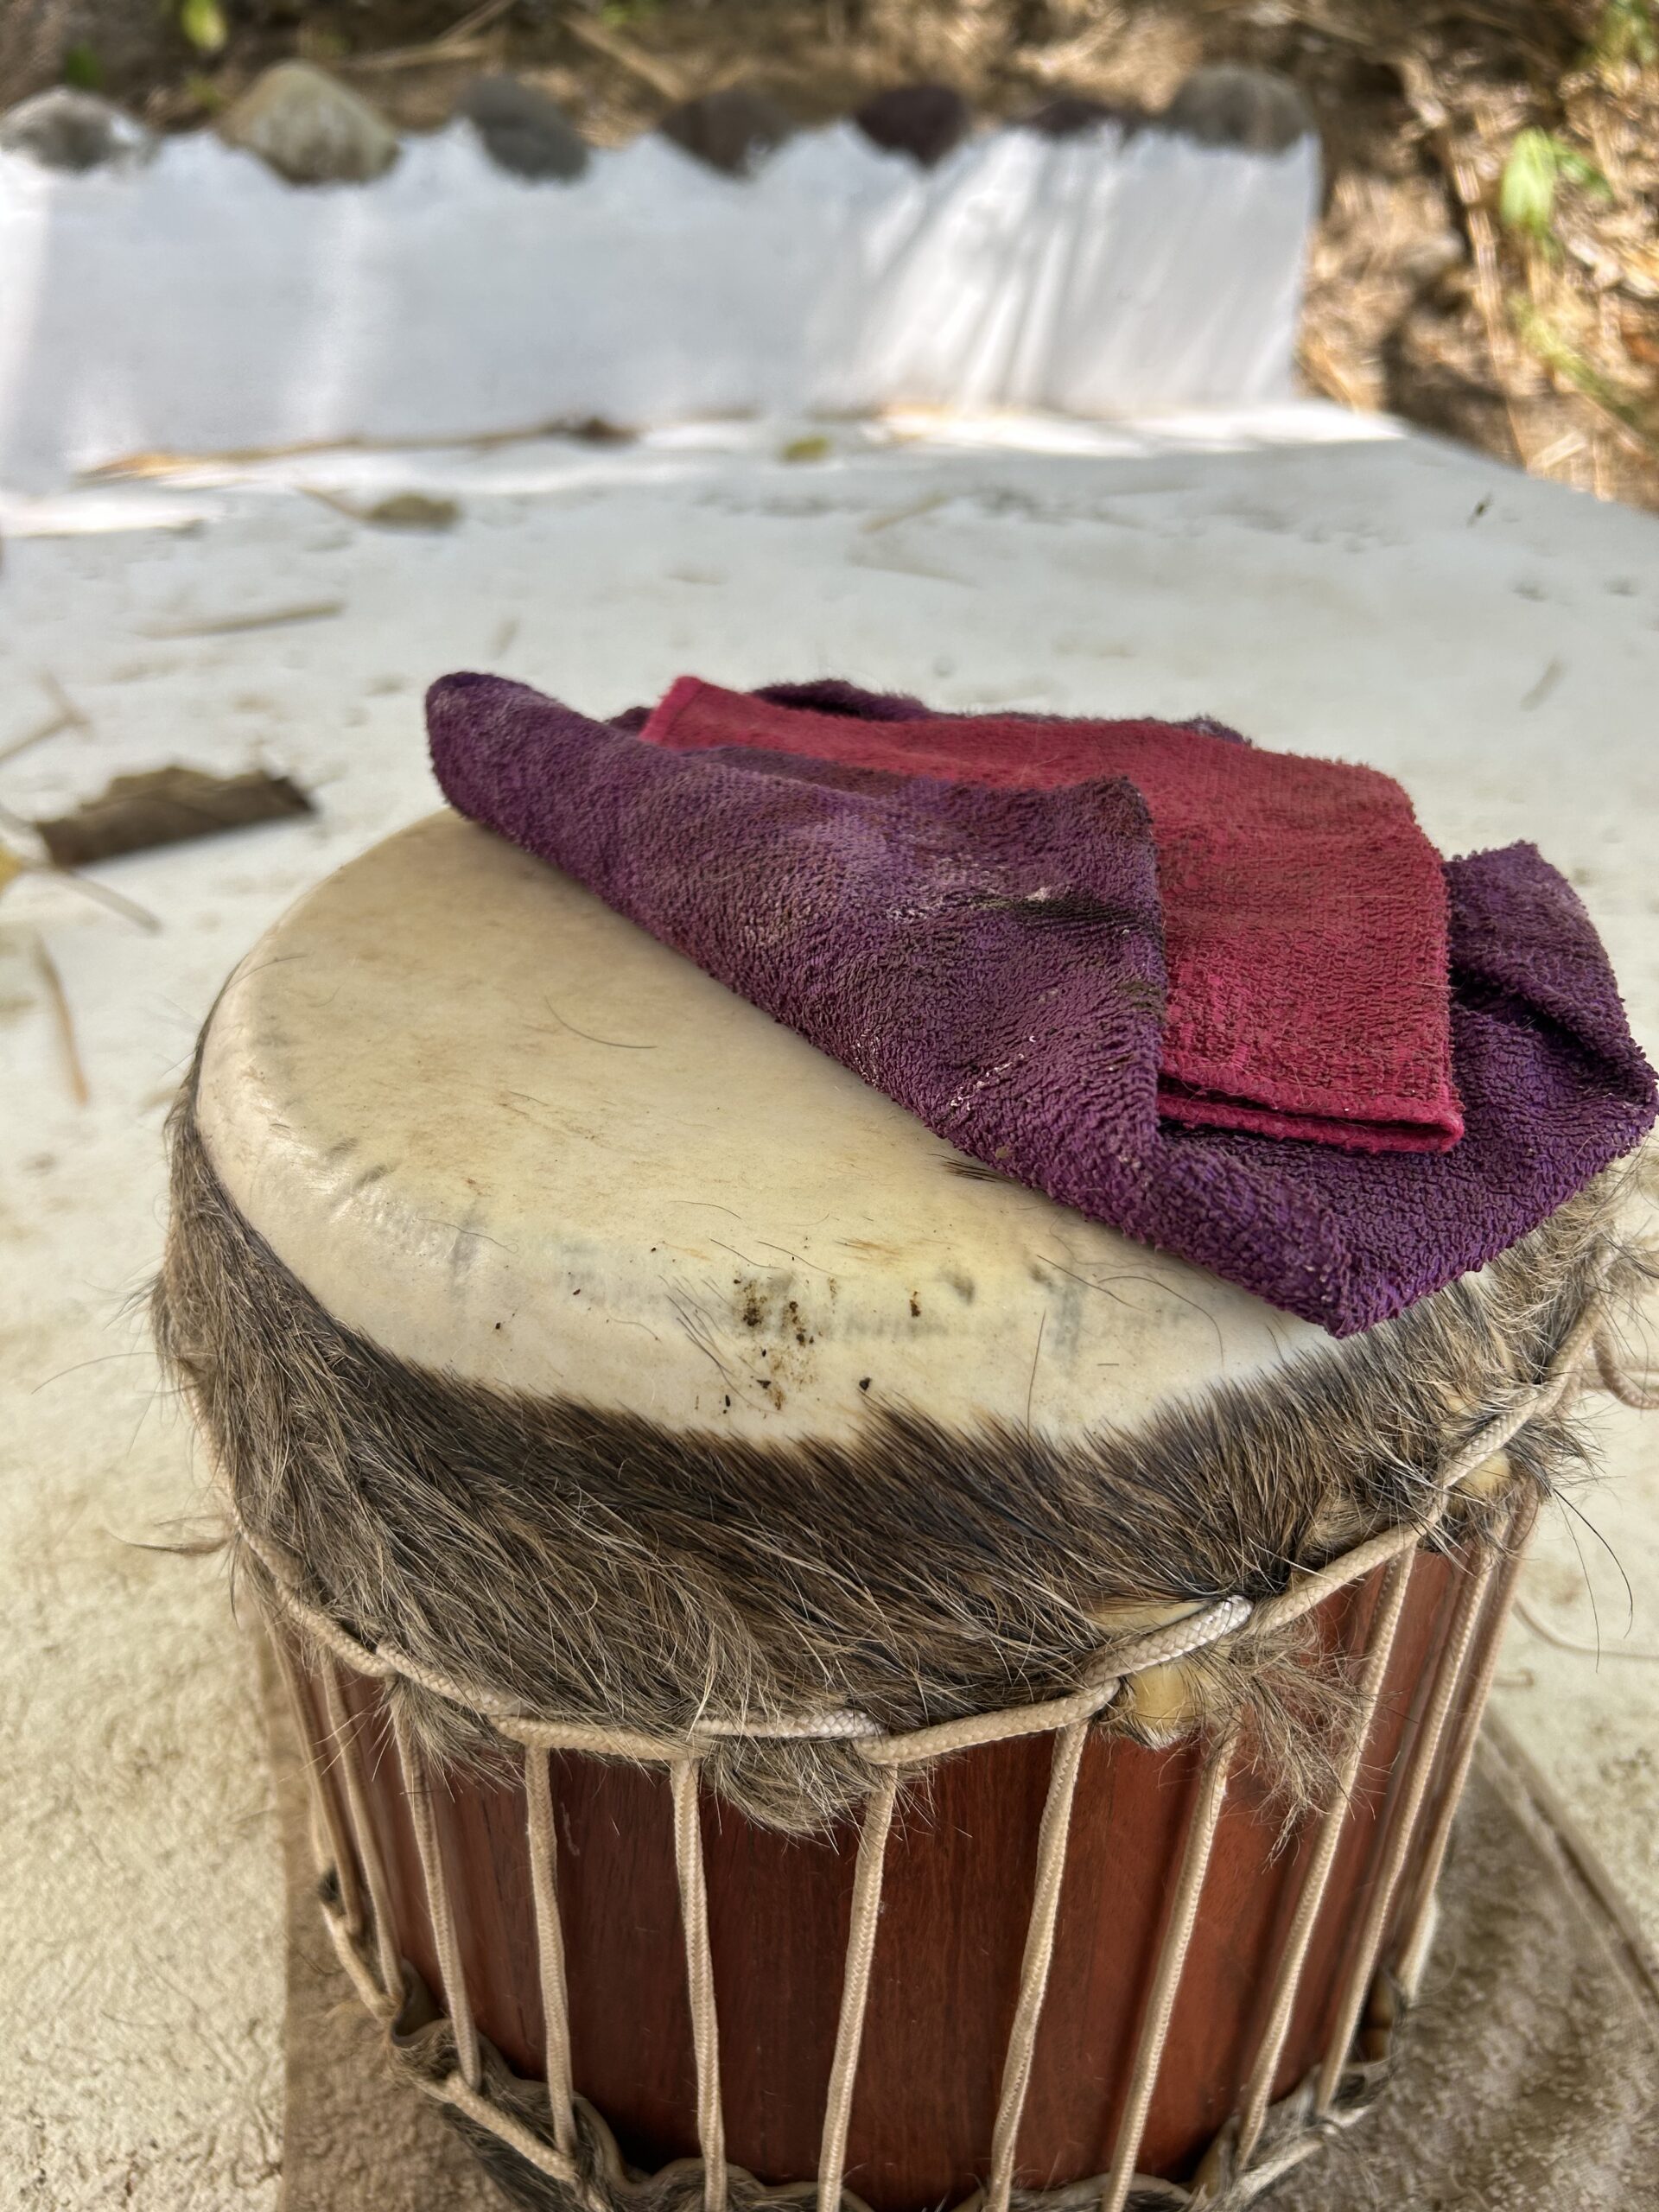
Once the initial lacing is done, the drum rests. The skin continues to tighten as it dries, and the tension in the rope system settles. I check it again after a day, pulling any ropes that have lost ground, working the skin back to an even tension. Weighted cloths are sometimes placed on the face to encourage it to seat flat as it dries. The drum is not rushed at this stage. The skin needs time to accept its shape.
The Result
A drum that sounds the way a drum should sound
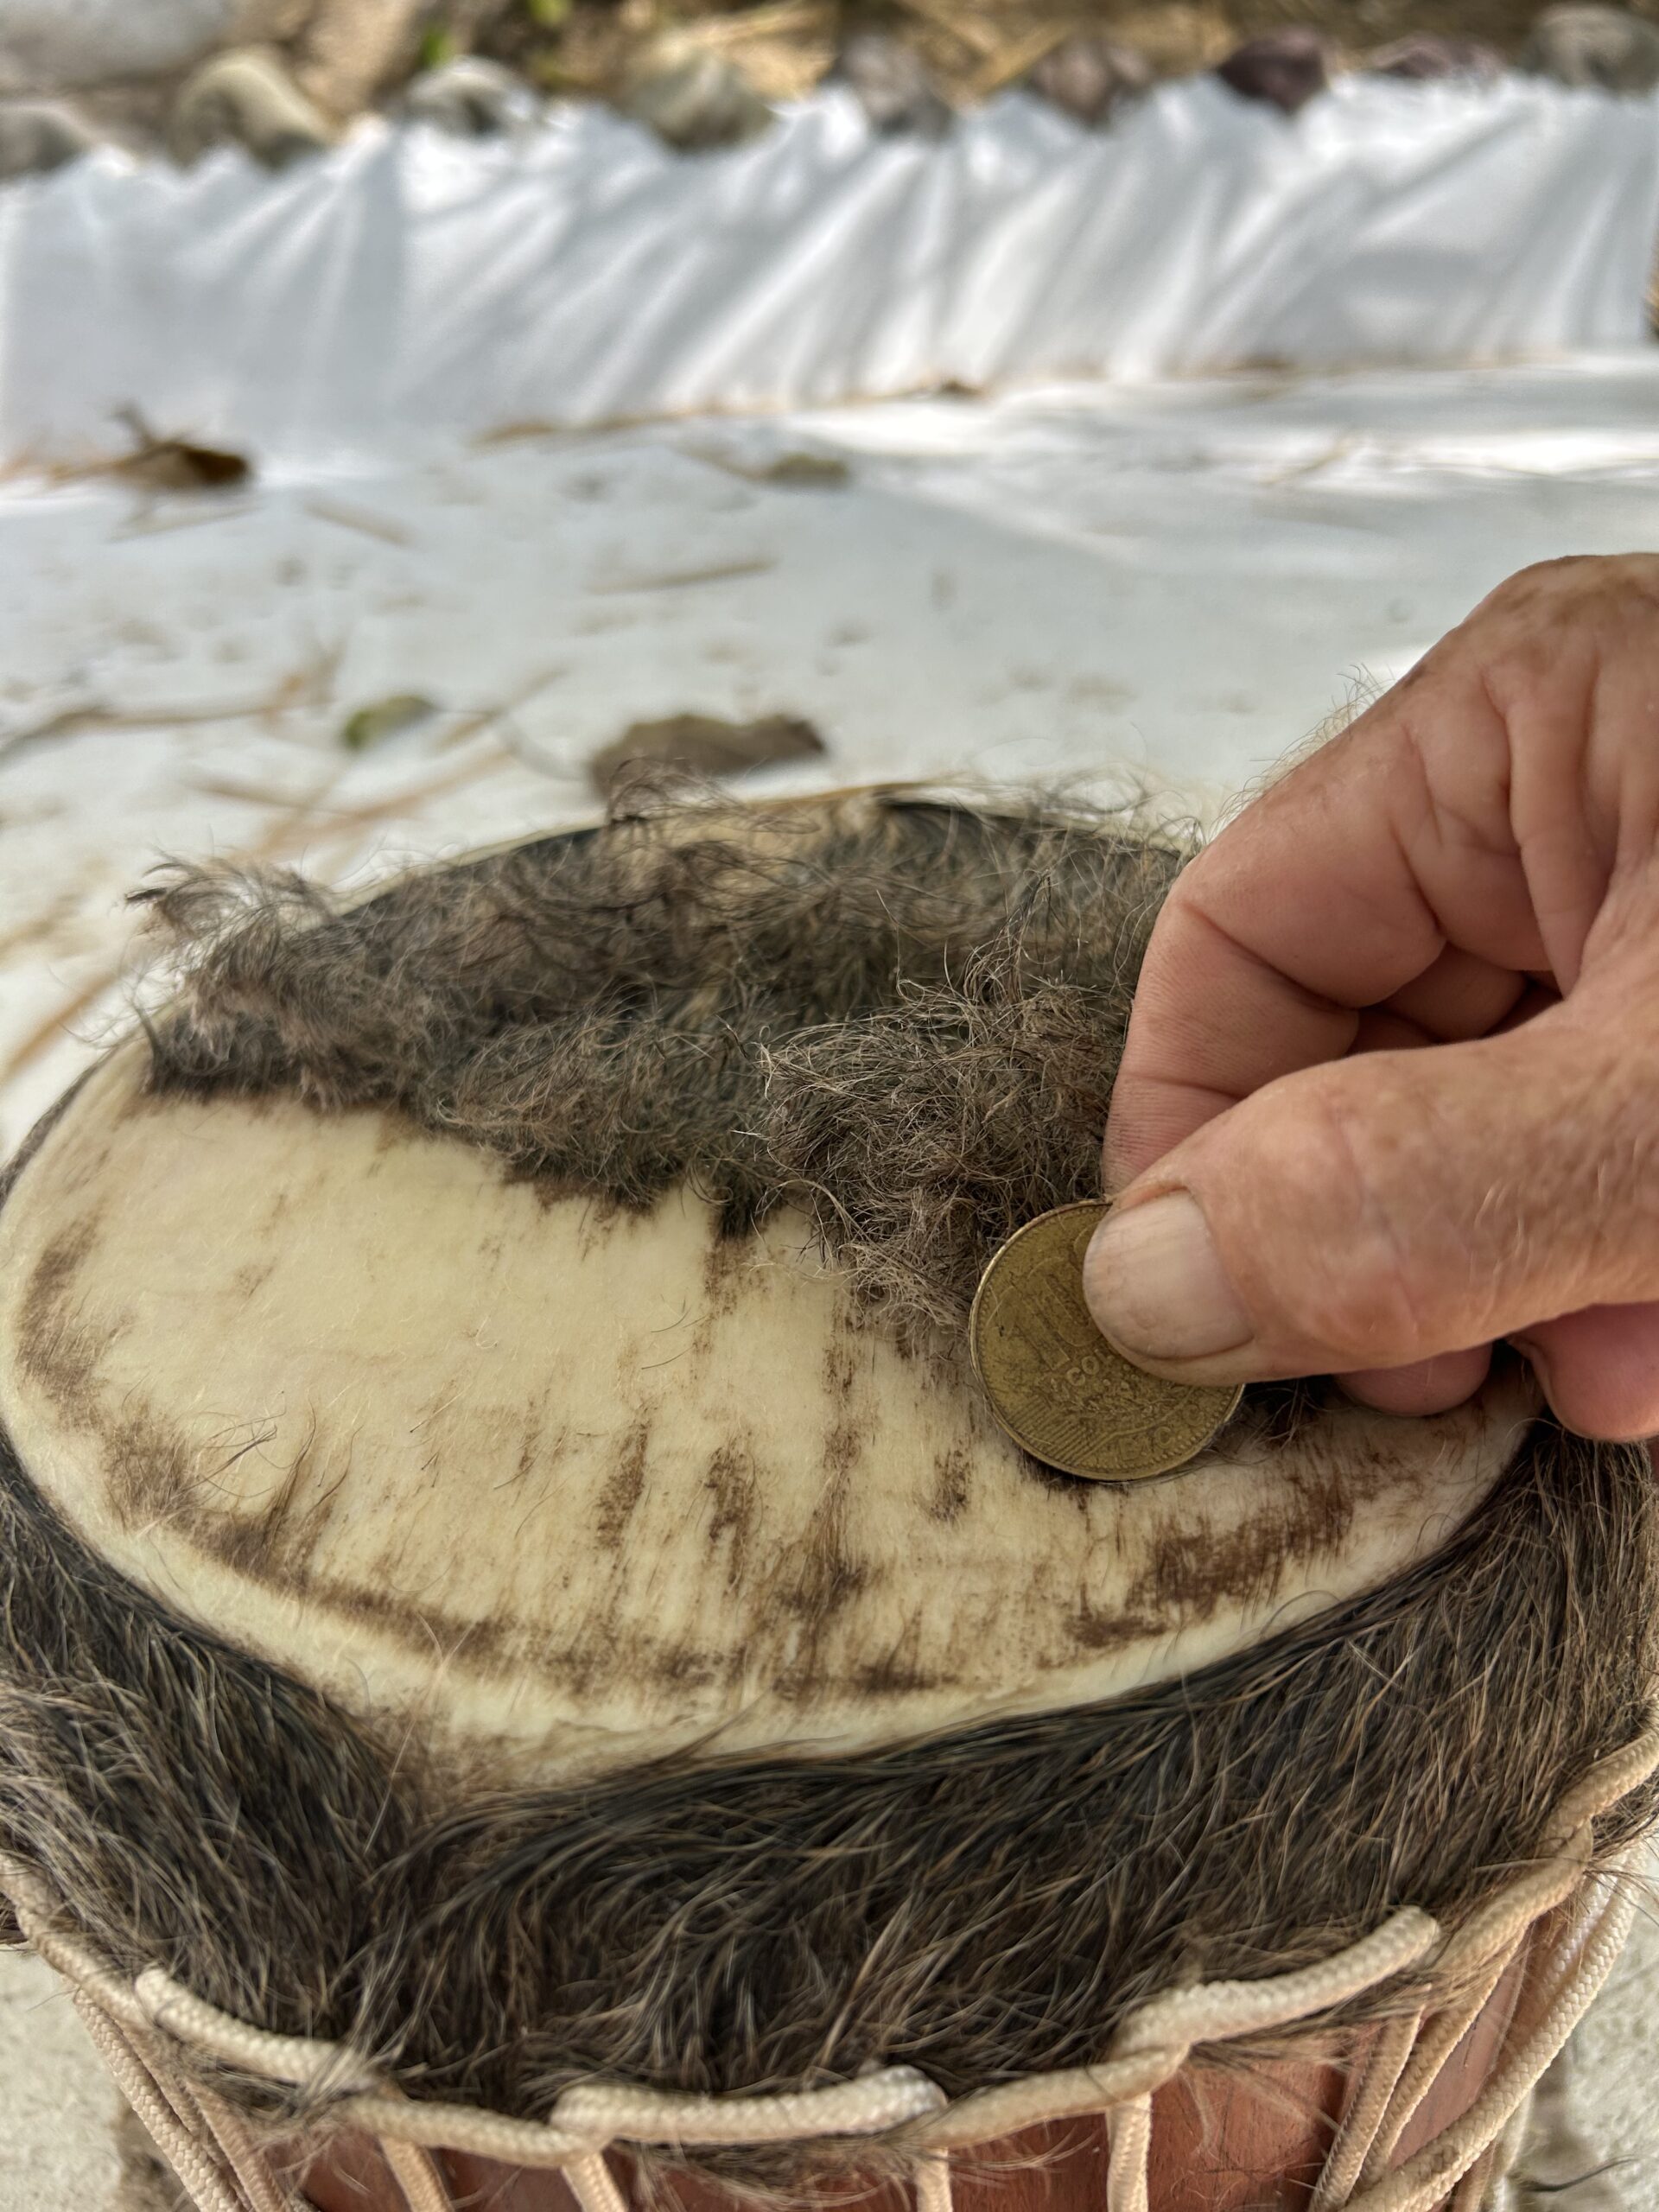
When the skin is fully dry and the tension has settled, I test it with a coin — pressing it lightly against the face at different points and listening for how the pitch changes. A well-seated skin will have a consistent tone across the whole face, with the centre slightly lower than the edge. If there is a dead spot — a place where the tone drops or goes hollow — I know the skin has not seated evenly there and I go back to the ropes.
When everything is right, it is right in a way you can feel before you even strike the drum. There is a quality to a properly tensioned skin — a firmness under the fingertip, a slight give, a sense of stored energy. And when you do strike it, the drum speaks immediately. Not a thud. A voice.
That is what I am making. Not a product with specifications. A voice that belongs to the wood it came from and the hands that shaped it, and that will carry whatever is asked of it — ceremony, music, prayer, or simply the pleasure of being played.